How to Split 3D Models in Maya?
In the field of 3D modeling, Maya is widely used software. Whether for animation, gaming, or architectural visualization, splitting models is a common requirement. By splitting, you can better manage complex models and lay a solid foundation for subsequent texturing and animation work. This article will provide a detailed guide on how to effectively split 3D models in Maya, along with practical tips and considerations.
Preparation
Before starting the splitting process, ensure your model is correctly imported into Maya. If the model is too complex, consider simplifying the geometry first to improve operational efficiency. Select your model in the interface and enter modeling mode to clearly view all faces and edges.
1. Choosing the Right View
Selecting the appropriate view is crucial during the splitting process. You can work in perspective, front, or side views. Choosing different views based on your needs can help you clearly see the model’s structure and avoid mistakes.
2. Understanding Model Structure
Before splitting, it’s essential to understand the model’s structure. Observe the various parts of the model and identify the areas that need splitting. A reasonable split will enhance the overall usability of the model.
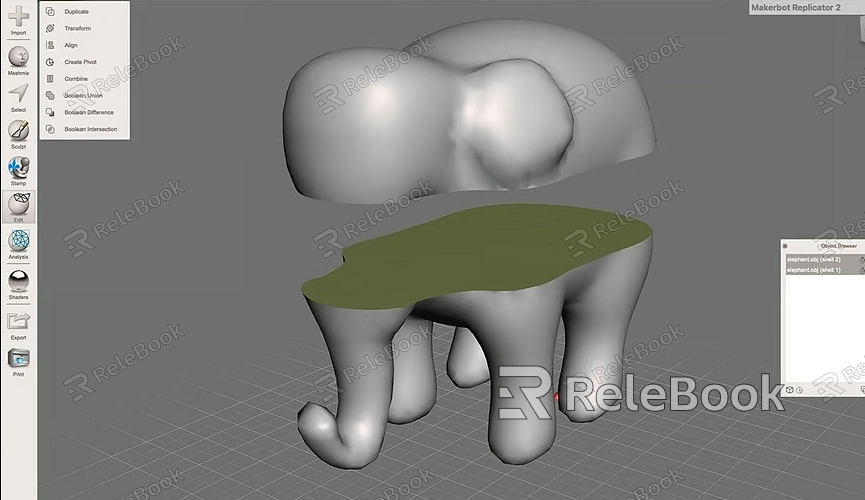
Using the Cut Tools
In Maya, the cut tools are the primary tools for splitting models. Various tools can achieve different types of splits. Below are some commonly used cut tools.
1. Selecting the Right Cut Tool
In the top menu bar, select the “Modeling” tab to find the “Cut” tools. Depending on your needs, you can choose the “Cut Face Tool” or the “Multi-Cut Tool.” Both tools effectively split models, but their operation methods differ slightly.
2. Cut Face Tool
After selecting the “Cut Face Tool,” click and drag the mouse on the model’s surface to create a new cutting line. Pay attention to the position and angle of the cut line to ensure precision. Once done, press the Enter key to confirm the cut.
3. Multi-Cut Tool
The Multi-Cut Tool can achieve more complex splitting effects. After selecting it, follow the prompts to click on the model and create multiple cut points. You can adjust the positions of these points to achieve different shapes for your splits.
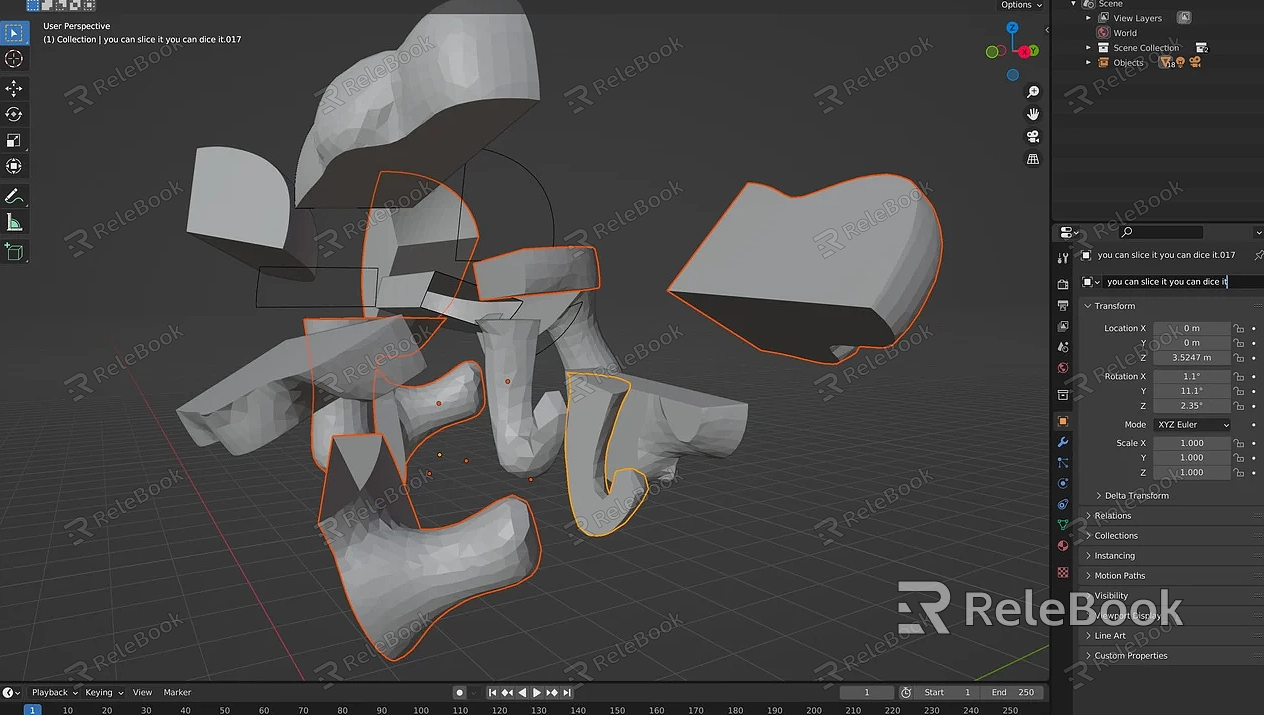
Fine-Tuning the Cut Faces
Once the initial splits are complete, fine-tuning is usually necessary. This ensures that each split part meets the design requirements.
1. Selecting Edges
Using the selection tool, select specific edges on the model for adjustment. Holding the Shift key allows you to select multiple edges for unified adjustments.
2. Moving and Scaling
After selecting edges, you can use the move and scale tools to adjust their positions and sizes. This step ensures the alignment and proportions between split faces, maintaining the overall aesthetics of the model.
3. Deleting Unnecessary Faces
After completing the splits, there may be some excess faces. You can select these faces and press the Delete key to remove them. This helps simplify the model and increases the efficiency of subsequent operations.
Applying Materials and Textures
After splitting the model, the next step is to apply materials and textures to each part. This step is crucial for making the model look more realistic.
1. Material Editor
In the top menu, select “Window” > “Material Editor.” Here you can create new materials and adjust their properties. Choose appropriate material attributes for each split part based on the requirements.
2. Texture Mapping
Using the UV Editor, create UVs for each split part. Apply texture maps to the corresponding UVs to ensure proper alignment with the model. This step enhances the realism of the model during rendering.
Exporting the Model
Finally, after completing all operations, you can export the model. When exporting, choose an appropriate format to ensure compatibility with other software.
1. Selecting Export Format
In the menu, select “File” > “Export.” Choose from formats like Facebook or OJ based on your needs. Ensure the selected format supports the software you’ll be using next.
2. Saving Settings
In the export settings, choose the appropriate options, such as whether to export materials and textures. After confirming, click export to save the model.
Mastering this skill allows for more efficient management of complex models. By choosing tools wisely, fine-tuning, and applying materials, you can create high-quality models. I hope this article helps you better understand and apply splitting techniques, improving your modeling skills. For more high-quality 3D models and textures, visit Relebook to download.
FAQ
What are the specific steps to split a model in Maya?
First, prepare your model, then select the cut tools and use either the Cut Face Tool or the Multi-Cut Tool for splitting. Afterward, fine-tune the splits and apply materials and textures.
What is the difference between the Cut Face Tool and the Multi-Cut Tool?
The Cut Face Tool is suitable for simple splits, while the Multi-Cut Tool is better for complex shape cuts. Choose based on your specific needs.
How can I ensure the alignment of the split parts after cutting?
After splitting, use the selection tool to select edges, and then use the move and scale tools for adjustments to ensure alignment.
What should I pay attention to when exporting the model?
When exporting, select the appropriate format and confirm whether to export materials and textures to ensure the model works correctly in other software.
Are there shortcuts in Maya that can improve splitting efficiency?
Maya has many shortcuts to speed up operations. For example, using Q for selection, W for moving, and E for rotating can enhance your workflow. Familiarizing yourself with these shortcuts can boost your efficiency.
