How to Make a Minecraft Texture Pack
Minecraft is a hugely popular sandbox game where players can create and explore endless worlds. Making your own Minecraft Texture Pack is a fun way to personalize your gaming experience and share your creativity with others. This article will guide you through the process of creating a Minecraft Texture Pack, helping you every step of the way.
What is a Minecraft Texture Pack?
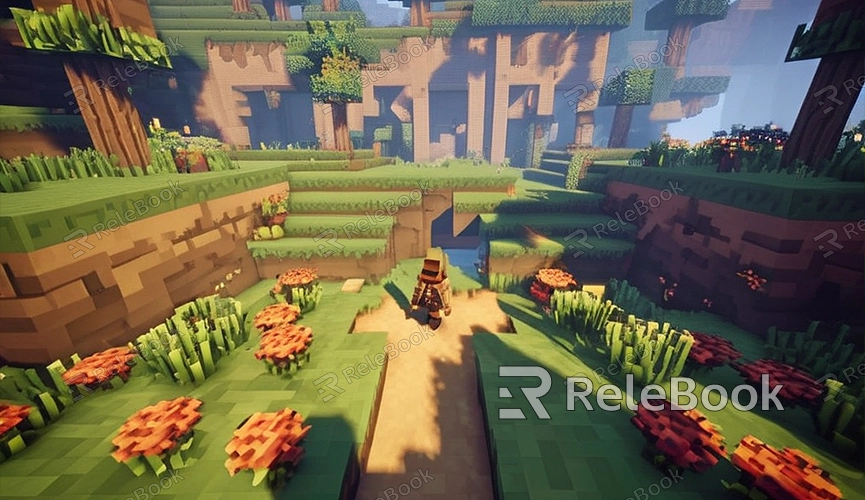
A Minecraft Texture Pack refers to replacing the default texture maps in the game, giving blocks, items, and creatures different appearances. By swapping texture packs, players can alter the game's visual effects, resulting in a whole new gaming experience.

Preparation
1. Tools and Software
Firstly, you'll need some basic tools and software:
Image editing software like Photoshop, GIMP, or Paint.NET for editing and creating texture maps.
Compression software like WinRAR or 7-Zip for compressing and extracting texture pack files.
A text editor like Notepad++ for editing configuration files.
2. Minecraft Version
Make sure you're aware of the Minecraft version you're using, as texture pack formats may vary between versions. It's recommended to use the latest version of Minecraft for compatibility with the latest game features.
Getting Started
1. Create Folder Structure
First, create a folder on your computer to store texture pack files. The folder structure should look like this:
```
Your_Texture_Pack/
│
├── assets/
│ └── minecraft/
│ ├── blockstates/
│ ├── models/
│ ├── textures/
│ └── ...
└── pack.mcmeta
```
2. Create pack.mcmeta File
The pack.mcmeta file is used to define basic information about the texture pack. Create a pack.mcmeta file using a text editor and add the following content:
```json
{
"pack": {
"pack_format": 6,
"description": "Your Texture Pack Description"
}
}
```
Where `pack_format` represents the texture pack format version, with the specific value determined by the Minecraft version. `description` is a description of the texture pack.
3. Get Default Texture Files
Extract the texture files you want to modify from Minecraft's default texture pack. You can find these files in the Minecraft installation directory, usually located at:
```
.minecraft/versions//.jar
```
Open this .jar file with compression software, extract the desired texture files, and place them into your texture pack folder.
4. Edit Texture Files
Use image editing software to open the extracted texture files and begin editing. Ensure to maintain the file's transparency and resolution. The recommended resolution is 16x16 pixels, but you can adjust as needed.
5. Save and Replace Texture Files
After editing, save the modified files back into the corresponding directories of your texture pack. For example, if you modified a block texture file, save it to:
```
Your_Texture_Pack/assets/minecraft/textures/block/your_block_texture.png
```
6. Add Additional Texture Files
If you want to modify more texture files, simply repeat the above steps to add more files to your texture pack.
Testing and Debugging
1. Compress Texture Pack
Compress the Your_Texture_Pack folder into a .zip file, but do not compress the folder itself, only the contents inside. Ensure the file structure is correct.
2. Install Texture Pack
Place the compressed texture pack file into Minecraft's texture pack folder, usually located at:
```
.minecraft/resourcepacks
```
3. Launch Minecraft and Select Texture Pack
Start Minecraft, go to the settings menu, select "Resource Packs," and then find and enable your created texture pack in the list.
4. Check and Debug
Enter the game and check if the modified textures are displaying correctly. If you encounter any issues, return to the image editing software for adjustments, then save and replace the texture files, repeating the testing process until satisfied.
Publishing and Sharing
1. Compress and Upload
Once you're satisfied with your texture pack, compress the final version and upload it to a file-sharing platform like Dropbox, Google Drive, or dedicated Minecraft forums and websites.
2. Create Download Links
Generate download links and write a post or article introducing your texture pack, including the download link and installation instructions.
3. Share with the Community
Share your texture pack with the Minecraft community, gather feedback, and continue improving and updating your work.
Creating a Minecraft Texture Pack not only enhances your gaming experience but also showcases your creativity and skills. With the steps outlined in this article, you can easily start making your own texture pack and share your creations with players worldwide. If you need high-quality 3D textures, HDRI, or 3D model downloads for creating models and virtual scenes, you can download them from Relebook and directly import textures and 3D models into your project.

