How to Slice a 3D Model in AutoCAD?
Understanding Slicing in AutoCAD
Before diving into the steps, it is important to understand what slicing means in the context of 3D modeling. Slicing a 3D model involves cutting it along a specified plane, creating a cross-sectional view of the model. This technique is commonly used to examine the internal structure of a model, highlight specific details, or prepare a model for manufacturing processes such as 3D printing.
Slicing is a non-destructive operation in AutoCAD, meaning that the original model remains intact, and you can generate multiple slices without altering the base model. This makes it an invaluable tool for designers who need to present different views of a model or analyze how different components interact within a structure.
Preparing Your Model for Slicing
1. Cleaning Up the Model
Before you begin slicing, ensure that your 3D model is clean and free of any unnecessary elements that might complicate the slicing process. This includes removing any extraneous lines, surfaces, or objects that are not relevant to the section you wish to create. Use the PURGE command to remove unused layers, blocks, and other elements that might clutter your workspace.
2. Setting the Correct View
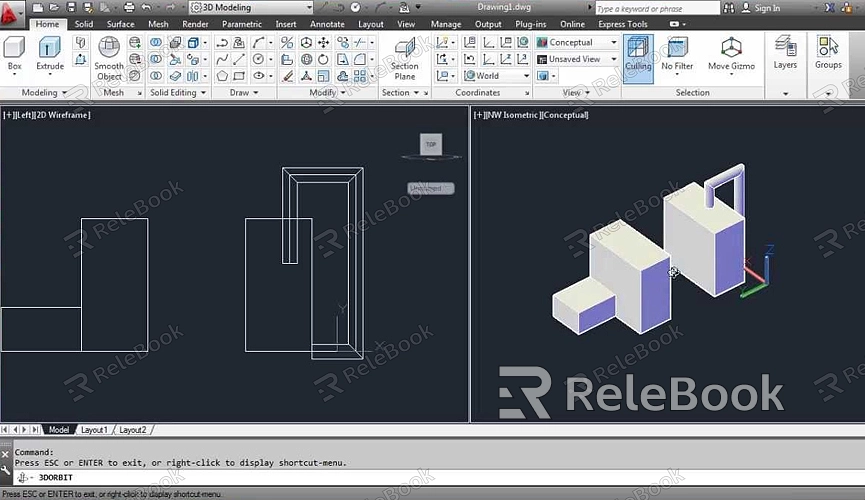
Switch to a 3D view by clicking on one of the 3D view options in the ViewCube or by using the VIEW command. It's important to orient your model correctly so that the slicing plane cuts through the desired section. You can adjust the view by rotating, panning, or zooming until you have the ideal perspective for slicing.
3. Creating a Work Plane
In AutoCAD, the slicing process is based on the placement of a slicing plane. To create an accurate slice, you need to establish a work plane that aligns with the section of the model you wish to slice. Use the UCS (User Coordinate System) command to set up a custom coordinate system if the default planes do not suit your needs. This step ensures that your slicing plane is correctly oriented relative to the model.
Slicing the Model
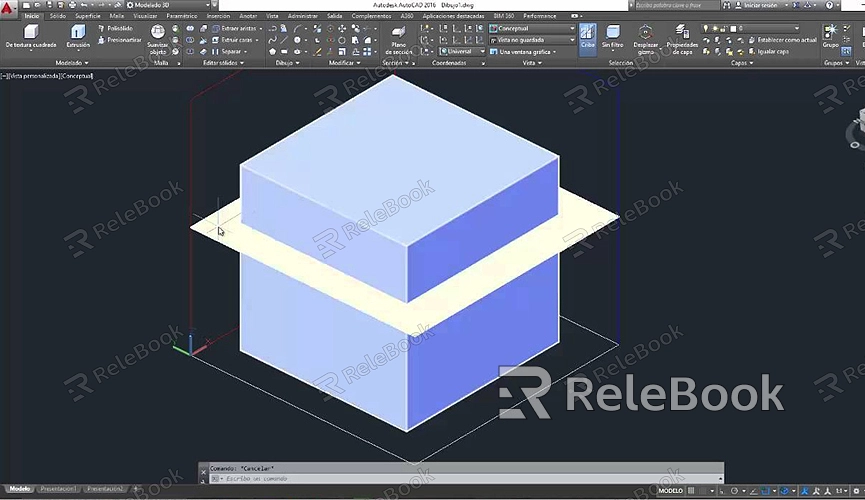
1. Using the SLICE Command
The primary tool for slicing a 3D model in AutoCAD is the SLICE command. Follow these steps to slice your model:
Activate the Command: Type SLICE in the command line and press Enter.
Select the Object: AutoCAD will prompt you to select the 3D object you want to slice. Click on the model to select it.
Specify the Cutting Plane: You can define the slicing plane in various ways:
Three Points: Specify three points on the model to define the plane.
Surface: Use an existing surface on the model as the slicing plane.
XY, YZ, or ZX Plane: Choose a standard plane aligned with the global coordinate system.
Determine the Side to Retain: After defining the plane, AutoCAD will ask which side of the plane you want to keep. You can choose either side or keep both parts of the model.
Finalize the Slice: Once you’ve made your choice, AutoCAD will execute the slice, dividing the model into two or more parts based on your selections.
2. Refining the Slice
If the initial slice doesn’t meet your expectations, you can refine it using the following methods:and
Undo and Retry: If you are not satisfied with the slice, use the UNDO command to revert to the original model and try slicing again with a different plane or approach.
Move or Rotate the Slice Plane: Use the MOVE or ROTATE commands to adjust the position or orientation of the slicing plane before performing the slice again.
Editing the Slice: After slicing, you can further edit the resulting parts by using commands such as TRIM, EXTEND, or EDITEDGE to clean up the edges and surfaces of the sliced sections.
Analyzing and Using the Sliced Model
1. Visualizing the Cross-Section
Once you have sliced your model, you can use various tools in AutoCAD to analyze the cross-section. The SECTIONPLANE command allows you to create a dynamic section that can be moved or rotated to explore different parts of the model. This is particularly useful for presentations or detailed design reviews.
2. Exporting the Slices
You may need to export the sliced sections for further analysis or manufacturing. AutoCAD allows you to export slices in different formats such as DWG, DXF, or STL, depending on your needs. For 3D printing, STL is the most common format. To export, simply select the sliced part, use the EXPORT command, and choose the desired file format.
3. Integrating Slices into Drawings
If you are creating technical drawings, the sliced views can be directly integrated into your layouts. Use the LAYOUT tab to position the sliced sections in your drawing sheets, add dimensions, annotations, and other details necessary for manufacturing or construction.
Tips and Best Practices
1. Plan Your Slices
Before performing any slices, take some time to plan the locations and orientations of the slices. Consider the purpose of the slice—whether it’s for analysis, presentation, or manufacturing—and choose the slicing plane accordingly.
2. Use Layers for Organization
Organize your slices using layers. This makes it easier to manage different views and sections within a complex model. You can toggle the visibility of different slices by turning layers on or off.
3. Save Multiple Versions
It’s a good practice to save multiple versions of your model at different stages of slicing. This allows you to revisit previous slices or experiment with different slicing approaches without losing your work.
4. Leverage AutoCAD’s 3D Tools
AutoCAD offers a variety of 3D tools beyond slicing that can enhance your model. Commands such as SOLIDEDIT, BOOLEAN, and EXTRUDE can be used in conjunction with slicing to create more complex designs and detailed cross-sections.
FAQ
Can I slice a 3D model in AutoCAD without losing the original model?
Yes, slicing in AutoCAD is a non-destructive process, meaning the original model remains intact. You can choose to keep both parts of the sliced model or delete one side, but the original data is preserved unless you decide to alter it.
What should I do if my slicing plane is not aligned with the part of the model I want to slice?
If the slicing plane is not properly aligned, use the UCS command to create a custom coordinate system that aligns the plane with the section of the model you want to slice. This ensures accurate slicing.
How can I visualize the interior of a complex model after slicing?
After slicing, use the SECTIONPLANE command to create dynamic sections that can be moved through the model. This allows you to visualize and analyze the interior structure without permanently altering the model.
Can I revert to the original model after slicing?
If you want to revert to the original model after slicing, use the UNDO command or reload a previously saved version of the model. It’s a good idea to save your work before slicing to ensure you can return to the unaltered model if needed.
Is there a way to automate slicing in AutoCAD?
AutoCAD does not have a built-in tool for fully automating the slicing process, but you can use scripting or third-party plugins to streamline repetitive slicing tasks. Custom scripts can be written using AutoLISP or VBA to automate certain aspects of slicing.
