How to Render Water Droplets Blender
Rendering water droplets in Blender can add natural detail and realism to your scenes. Whether simulating raindrops or droplets on a glass surface, mastering the techniques for rendering water droplets is essential. This article will provide a detailed guide on achieving realistic water droplet effects in Blender, along with practical tips.
Preparation
Before you start, ensure that your Blender software is installed and that you have a basic understanding of its operations. If you're new to Blender, familiarize yourself with the interface and rendering settings.
Creating a Water Droplet Model
First, we need to create a basic model of a water droplet in Blender. Here are the steps:
1. Add a Basic Geometry: In Blender, you can use a sphere as the base shape for the droplet. Press Shift + A and select "Mesh" > "UV Sphere" to add it to your scene.
2. Modify the Sphere: Select the sphere and enter Edit Mode (Tab key). Use the Scale (S key) and Transform tools to shape the sphere into a droplet. Typically, you elongate the bottom slightly and taper the top to form the droplet's profile.
3. Smooth the Model: To give the droplet a smoother appearance, select the droplet model in Object Mode and find the "Smooth" option in the right panel to apply the smoothing operation.
Setting Up the Water Droplet Material
The material settings for the water droplet are crucial for the final effect. Here’s how to set up a transparent material:
1. Create a New Material: In the "Material Properties" panel, click the "New" button to create a new material for the droplet model.
2. Set the Material Type: Change the material type to "Glass BSDF" or "Principled BSDF." Glass BSDF provides high-quality transparency, suitable for simulating realistic water droplets.
3. Adjust Transparency: In the material settings, adjust the "Index of Refraction" (IOR) to control the transparency. The IOR for water droplets is typically set to 1.33. You can also tweak the "Roughness" to control the surface smoothness.
4. Increase Reflection: In the material settings, increase the reflection properties to make the droplet look more realistic. You can adjust reflection through "Specular" or "Reflection Strength" parameters.
Adding Details and Effects
To enhance the realism of the water droplets, you can add some extra details and effects:
1. Add Bump or Normal Maps: Use bump maps or normal maps to add tiny surface details to the droplet. This can simulate small irregularities on the droplet's surface, making it look more authentic.
2. Set Up Lighting: Proper lighting settings can significantly enhance the droplet effect. Add appropriate light sources to your scene and adjust their position, intensity, and color to ensure the droplet's surface reflects light and produces highlights.
3. Use Volume Material: To simulate the internal refraction effects of the droplet, consider using volume materials to create more complex optical effects. For instance, using "Volume Scatter" can mimic light refraction inside the droplet.
Rendering the Water Droplet Effect
Once the model and material are set up, rendering is the final step:
1. Select the Rendering Engine: Blender supports multiple rendering engines, including Cycles and Eevee. For high-quality water droplet rendering, it’s recommended to use the Cycles rendering engine, as it provides more realistic ray tracing effects suitable for rendering complex transparent materials.
2. Set Rendering Parameters: In the "Render Settings" panel, adjust rendering parameters such as sample count and ray tracing depth. Higher sample counts can improve render quality but increase render time. Adjust parameters as needed to balance quality and speed.
3. Render and Check the Effect: Click the "Render Image" button or press F12 to start rendering the water droplet effect. Once rendering is complete, review the rendered image to ensure the droplet effect meets your expectations. If necessary, make adjustments to optimize the material and lighting settings.
Improving Render Effects
To achieve the best water droplet render results, consider the following tips:
- Adjust Light Intensity: Modify the intensity and position of light sources according to the scene’s needs to ensure appropriate reflections and refractions from the droplets.
- Use HDRI Backgrounds: Implementing a High Dynamic Range Image (HDRI) as a background can enhance ambient light effects in the render, making the droplets appear more natural.
- Post-Processing: After rendering, use image editing software (like Photoshop) for post-processing on the rendered image to further enhance the effects.
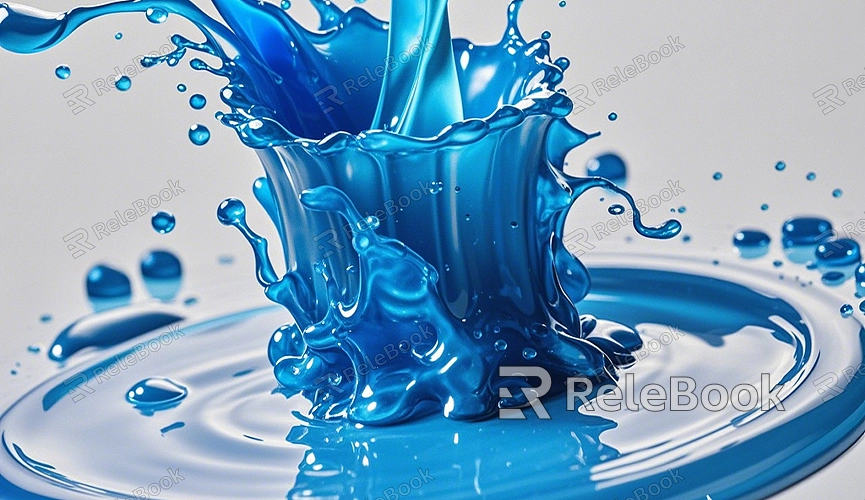
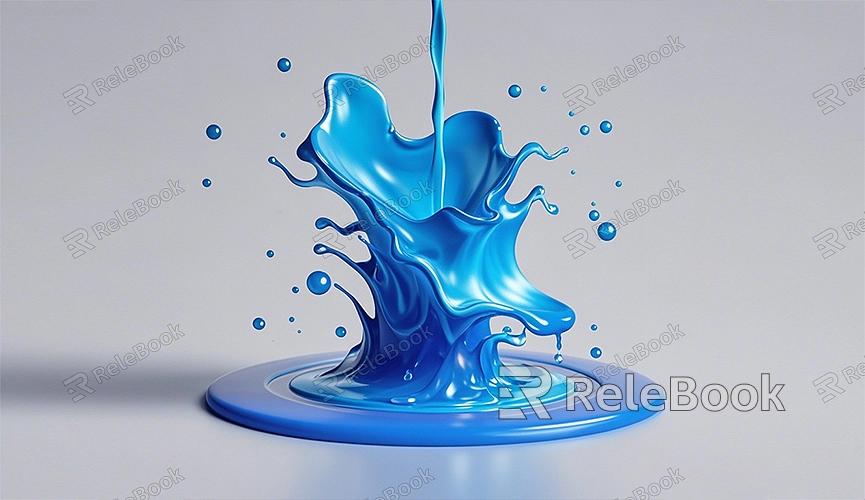
Rendering water droplets in Blender involves creating a base model, setting up materials, adding details, and adjusting rendering parameters. With precise material settings, appropriate lighting, and careful post-processing, you can create realistic water droplet effects that add realism and visual appeal to your 3D scenes.
If you need a variety of high-quality 3D textures and HDRIs for your models and virtual scenes, you can download them for free from [Relebook](https://textures.relebook.com/). For beautiful 3D models, visit [Relebook](https://3dmodels.relebook.com/), where you’ll find a wide selection of premium 3D resources to enhance your design quality and efficiency.
