How to Fix Distorted UV Maps in Maya?
Understanding UV Mapping and Distortion
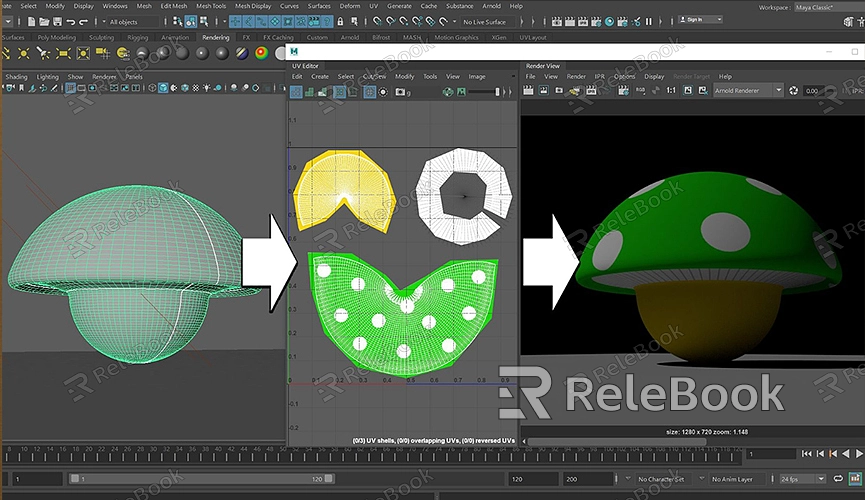
UV mapping is the process of projecting a 2D texture onto a 3D model. The letters "U" and "V" denote the axes of the texture, as "X," "Y," and "Z" are already used for the 3D model’s axes. When a UV map is distorted, it means that the texture doesn’t align properly with the model, leading to visual issues. This can occur due to incorrect UV unfolding, improper scaling, or overlapping UV shells.
Identifying Distorted UV Maps
Before fixing a distorted UV map, you must first identify the problem areas. In Maya, you can do this by applying a checkerboard texture to your model. The checker pattern makes it easy to spot any distortions—squares should remain uniform in size and shape. Any areas where the squares are stretched or squashed indicate distortion.
Tools and Techniques to Fix UV Distortion in Maya
1. Use the UV Editor
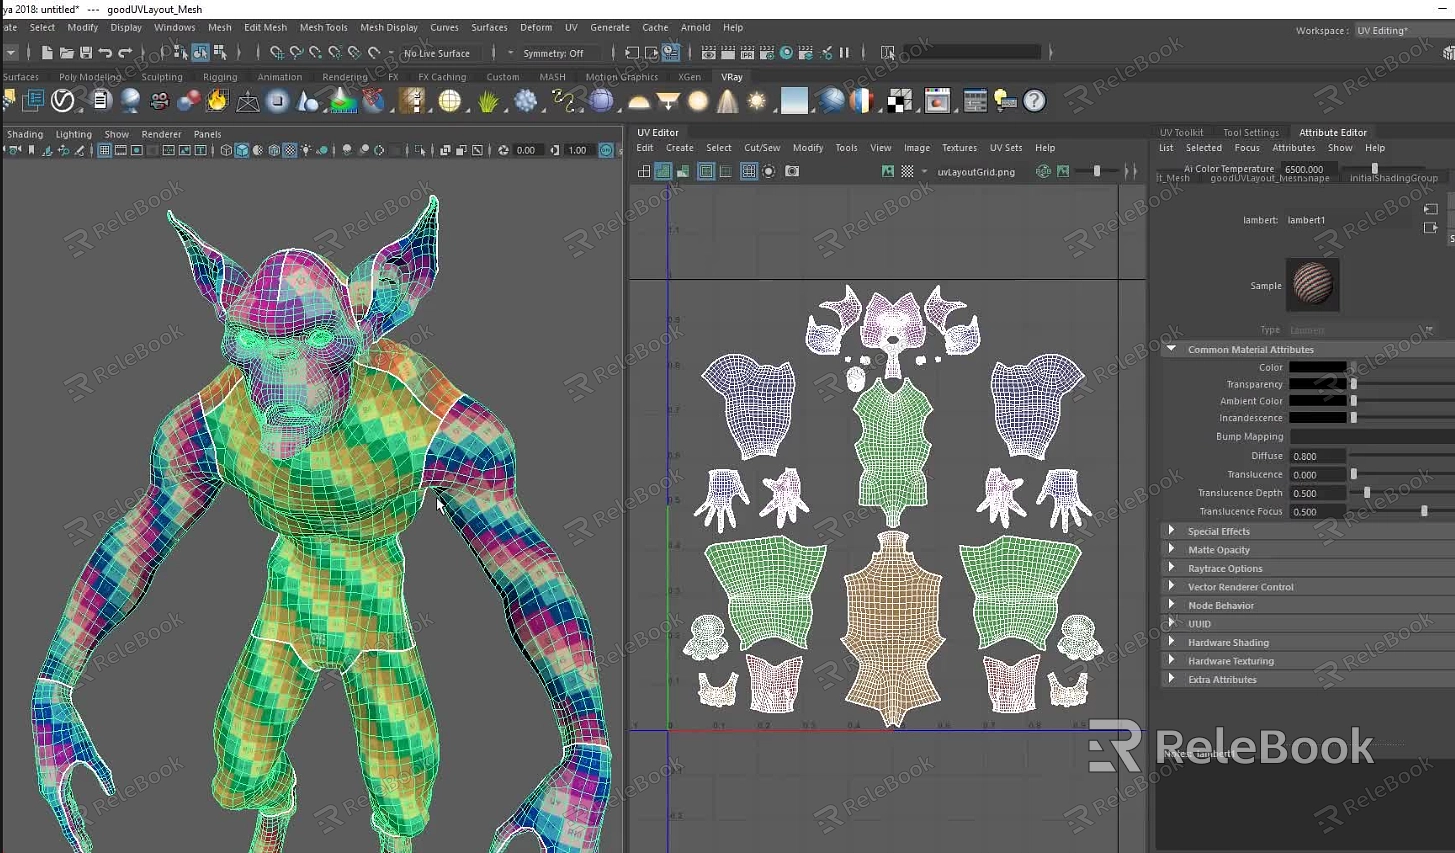
Open the UV Editor in Maya by going to UV > UV Editor.
Here, you can see the UV layout of your model. Distortions are often visible as irregularities in the UV grid.
You can start by manually adjusting the UV points. Select vertices, edges, or faces in the UV Editor and move them to reduce stretching or compression. This method is time-consuming but offers precise control.
2. Automatic UV Unwrapping
Maya offers automatic unwrapping options that can be a quick fix for simple models.
Go to UV > Automatic. This option tries to unwrap your model in a way that minimizes distortion.
After applying automatic unwrapping, check the UV layout and make further manual adjustments if needed.
3. Unfold and Optimize
The Unfold tool is designed to spread out UV shells to reduce distortion. Select your UV shell in the UV Editor, then go to Tools > Unfold.
You can also use the Optimize tool (found in the same menu) to relax and optimize the UV shell, reducing stretching.
These tools work best when combined with manual adjustments, allowing you to fine-tune the UV map after using them.
4. Cut and Sew UVs
Sometimes, the distortion is due to complex geometry that doesn’t unwrap neatly. In these cases, you might need to cut your UV map into smaller, more manageable pieces.
Use the Cut UV Tool to create new seams in the UV map. This can be done by selecting edges and cutting along them.
After cutting, unfold the UV shells again and sew them back together where necessary. This approach can drastically reduce distortion but requires careful planning of your UV seams.
5. Pinning UVs
Pinning allows you to lock certain UV points in place while you adjust others. This can be useful when you want to keep specific areas of your texture undistorted while fixing surrounding areas.
To pin UVs, select the vertices in the UV Editor, then go to Transform > Pin. Once pinned, you can manipulate the rest of the UV shell without affecting the pinned points.
6. Using UV Grids and Snap
Maya’s UV Editor offers grid and snapping features that can help align UV points more precisely.
Enable the UV grid from the UV Editor’s menu and use the snap options to align UVs to the grid. This can help eliminate minor distortions and ensure your UV map is neat and organized.
7. Check for Overlapping UVs
Overlapping UVs can cause textures to appear incorrectly on your model. In the UV Editor, you can use the UV > Layout option to automatically lay out UV shells, reducing overlaps.
If you notice overlapping, manually adjust the UV shells to ensure they occupy unique spaces on the UV map.
Common Pitfalls and How to Avoid Them
1. Avoid Over-Reliance on Automatic Tools
Automatic unwrapping and unfolding tools in Maya can be tempting to use, but they often require manual tweaks. Don’t rely solely on these tools; use them as a starting point for further refinement.
2. Plan Your UV Layout
Before diving into UV mapping, plan your seams and unwrap strategy. This will save you time and reduce the need for extensive adjustments later.
3. Check Your Work Regularly
As you make adjustments, continually check your model with a checkerboard texture to ensure that distortions are being corrected. It’s easier to fix issues as they arise rather than trying to resolve them all at once.
FAQ
What causes UV map distortion in Maya?
UV map distortion can be caused by improper unwrapping, scaling issues, or overlapping UV shells. Complex geometry can also lead to challenging UV layouts that require careful adjustment.
Can I prevent UV distortion entirely?
While it's difficult to prevent UV distortion entirely, proper planning and careful seam placement can minimize the issue. Using Maya’s tools like Unfold and Optimize can also help reduce distortion.
How do I know if my UV map is distorted?
Applying a checkerboard texture to your model is a quick way to check for UV map distortion. If the squares are stretched, squashed, or misaligned, your UV map needs adjustment.
Is it possible to fix UV distortion after applying textures?
Yes, you can adjust the UV map even after applying textures. However, this might require additional texture adjustments to align correctly with the new UV layout.
