What do the different sculpting tools do in Blender?
The Basics of Sculpt Mode
Before diving into individual sculpt tools, it’s essential to understand Blender's Sculpt Mode. Sculpt Mode is a specialized workspace within Blender that enables artists to manipulate the surface of 3D models with various brushes and tools. Unlike traditional modeling, which involves modifying vertices and edges, sculpting involves shaping and refining the model’s surface as if working with virtual clay.
To enter Sculpt Mode, you first need to select a mesh object and switch from Object Mode to Sculpt Mode using the mode selector in the top-left corner of the 3D Viewport. Once in Sculpt Mode, you can access a range of sculpting tools designed to alter the geometry of your model.
The Draw Tool
The Draw tool is one of the most fundamental sculpting tools in Blender. It allows artists to push and pull the surface of the model, creating raised and lowered areas. This tool is ideal for creating basic shapes and forms, adding volume to your model, and defining large features.
When using the Draw tool, you can adjust parameters such as brush size and strength to control how much influence the brush has on the model. For example, a larger brush size will affect a broader area, while higher strength will make more pronounced changes to the surface.
The Smooth Tool
The Smooth tool is used to refine and soften the surface of your model. It’s particularly useful for removing unwanted bumps and smoothing out rough areas. By redistributing vertices and averaging out the surface, the Smooth tool helps achieve a more polished and natural look.
You can adjust the strength of the Smooth tool to control how aggressively it smooths the surface. A lower strength will result in a more subtle smoothing effect, while a higher strength will more dramatically alter the model’s surface.
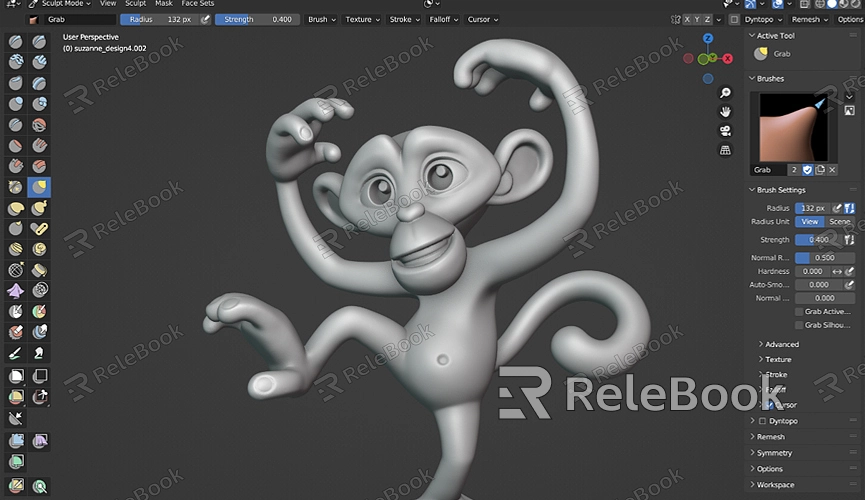
The Grab Tool
The Grab tool allows you to move and reposition large portions of your model. Unlike the Draw tool, which adds or subtracts material, the Grab tool shifts existing geometry. This is useful for making significant adjustments to the shape or pose of your model without altering its surface detail.
To use the Grab tool effectively, select it from the tool panel and click and drag on the model. You can adjust the brush size to control the area being manipulated, making it easier to make precise changes or larger adjustments as needed.
The Pinch Tool
The Pinch tool is designed to create sharp, defined edges and folds in your model. It works by pulling vertices towards the center of the brush’s influence, effectively “pinching” the surface. This tool is useful for adding intricate details such as creases, wrinkles, and other fine features.
When using the Pinch tool, you can control the brush size and strength to achieve the desired level of detail. A smaller brush size allows for more precise pinching while adjusting the strength affects how pronounced the pinching effect is.
The Inflate Tool
The Inflate tool is used to add volume to your model by pushing the surface outward. It effectively inflates the mesh from the inside, which can be useful for creating bulges, enlarging areas, or adding details that require a more pronounced surface.
Adjusting the brush size and strength will determine how much volume is added and how broadly it affects the model. The Inflate tool is particularly helpful for creating organic shapes and adding details that require a more rounded appearance.
The Scrape Tool
The Scrape tool is designed to create flat or beveled surfaces by removing excess material from your model. It’s useful for achieving clean, planar surfaces and for sharpening edges. The Scrape tool works by “scraping” away material, which can be adjusted based on the brush size and strength.
This tool is particularly effective for hard surface modeling, where clean lines and defined edges are essential. It helps to refine and finalize the shape of your model by smoothing and flattening specific areas.
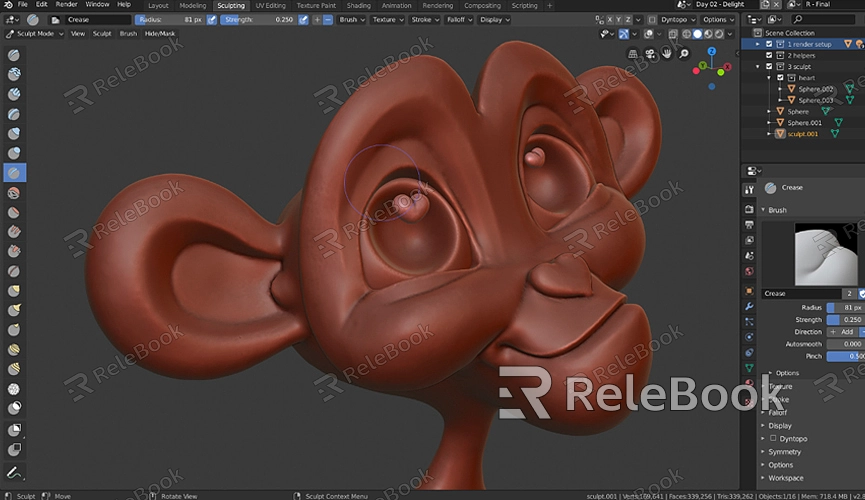
The Crease Tool
The Crease tool allows you to create sharp, well-defined creases and folds in your model. It works by pushing vertices towards each other, creating a tight, angular edge. This tool is ideal for adding intricate details like seams, wrinkles, and other sharp features.
You can adjust the brush size and strength to control the depth and width of the crease. A smaller brush size will create finer creases, while a higher strength will make the creases more pronounced.
The Flatten Tool
The Flatten tool is used to level out areas of your model, creating uniform surfaces. It’s useful for smoothing out uneven areas or correcting distortions. By pushing the surface towards a specified plane, the Flatten tool helps achieve a more balanced and symmetrical appearance.
To use the Flatten tool, select it from the sculpting tools and brush over the areas you want to even out. Adjusting the brush size and strength allows for precise control over how much material is flattened and how aggressively the tool works.
The Multiresolution Modifier
While not a sculpting tool per se, the Multiresolution modifier is a crucial feature for detailed sculpting in Blender. It allows you to work with different levels of detail on your model, enabling you to add fine details without affecting the overall mesh.
By subdividing the mesh into multiple resolution levels, the Multiresolution modifier allows for both high-resolution detailing and low-resolution adjustments. This flexibility is invaluable for creating intricate textures and complex models.
FAQ
What is the best way to learn sculpting in Blender?
The best way to learn sculpting in Blender is through practice and experimentation. Start with basic tutorials and gradually explore more advanced techniques. Blender’s online community and various educational resources can also provide valuable guidance and tips.
Can I use sculpting tools for hard surface modeling?
Yes, sculpting tools in Blender can be used for hard surface modeling, although they are typically more suited for organic shapes. Tools like the Scrape and Flatten tools are particularly useful for creating clean, hard surfaces.
How do I optimize my model for sculpting?
To optimize your model for sculpting, ensure that it has sufficient geometry to support detailed work. You can use modifiers like Subdivision Surface or Multiresolution to add more detail as needed. Avoid overly complex meshes that can slow down the sculpting process.
Are there any shortcuts for sculpting tools in Blender?
Yes, Blender offers various shortcuts for sculpting tools to improve workflow efficiency. For example, pressing "Shift + F" allows you to adjust brush strength, while "Shift + S" can be used to snap the view to a specific area.
Can I sculpt multiple objects at once?
In Blender, you can only sculpt on one object at a time. However, you can join multiple objects into a single mesh if you want to sculpt them collectively. Use the "Join" function (Ctrl + J) to combine objects before entering Sculpt Mode.
