How to Optimize HDR Settings for Diamond Textures in V-Ray
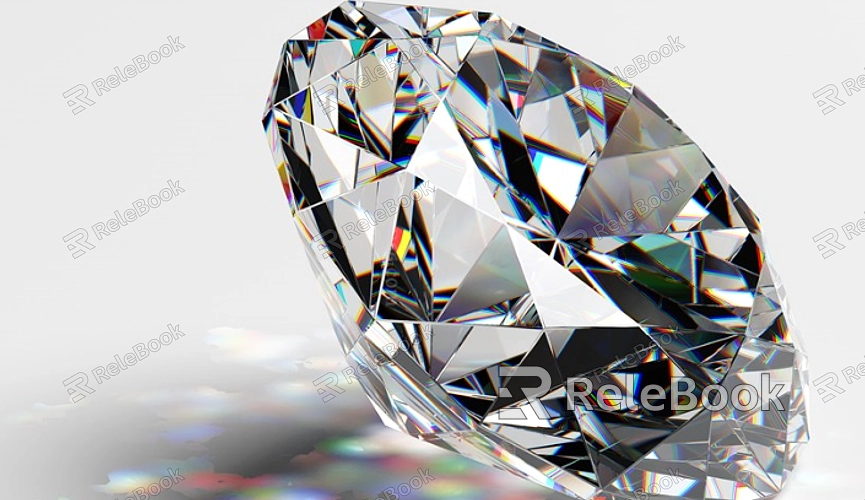
In V-Ray, designers often use HDR (High Dynamic Range) images for lighting, which, when combined with finely-tuned diamond textures, can significantly enhance the reflection and refraction effects. This makes diamonds look brighter and more realistic. Such scenarios are common in jewelry design, product showcases, and visual advertising, using software like SketchUp, 3ds Max, and Blender. This article will explore how to optimize HDR settings for diamond textures in V-Ray, covering lighting adjustments, material optimization, and more, to help you achieve striking visual results in your renderings.
1. Importing the Right Diamond Model and Materials
For diamonds to exhibit their optical properties to the fullest, the model and material settings must be precise.
Accurate Diamond Model: The geometry of the diamond directly influences how light is reflected and refracted. Choosing a model with accurate proportions and details is key. A high-polygon model ensures that the diamond’s facets can properly interact with light.
Material Setup: In V-Ray’s material editor, assign a glass material to the diamond and adjust the index of refraction (IOR) to 2.42, which reflects the real-world value for diamonds. You can also add scattering parameters to simulate the complex internal reflections and refractions that occur within the stone.
2. Choosing the Right HDR Lighting File
HDR images play a crucial role in how light and shadows are presented in a rendering. The choice of HDR file can drastically change the lighting environment.
High-Contrast HDR: To highlight the brilliance and reflections of the diamond, use HDR images with strong light contrasts, such as daylight, sunset, or night scenes. These environments with sharp lighting transitions emphasize the highlights and shadows on the diamond.
Loading HDR for Environment Lighting: In V-Ray’s environment settings, import the chosen HDR file and apply it to the scene using the Dome Light function. This ensures natural and realistic lighting across the entire scene.
3. Adjusting HDR Brightness and Exposure
To make sure the diamond shines just right, tweaking the HDR brightness and exposure is essential.
Exposure Settings: V-Ray’s Dome Light includes exposure options. Depending on the scene, you can increase exposure to make the diamond surface brighter and more dazzling or reduce it to avoid overexposure.
Brightness and Contrast Tuning: In addition to exposure, you can further adjust the HDR image’s brightness and contrast using V-Ray’s color management tools. This helps maintain the diamond’s visual quality under different lighting conditions.
4. Optimizing Reflections and Refractions
The visual appeal of a diamond relies heavily on its reflective and refractive qualities, and HDR lighting can enhance these traits.
Reflections: In the material editor, control the reflection intensity. Well-calibrated reflections will create sparkling highlights on the diamond surface. Be cautious, though—too much reflection may wash out details and make the material overly bright.
Refraction: Setting the correct IOR is critical for displaying the optical characteristics of diamonds. Make sure the IOR is set to 2.42, which ensures that light refracts realistically within the diamond, creating a true-to-life sparkle.
5. Optimizing Ray Tracing
To capture the fine details of light and shadow around the diamond, proper ray tracing settings are equally important.
Increase Ray Depth: In V-Ray’s render settings, increasing the ray tracing depth allows light to penetrate and bounce through multiple facets of the diamond, creating more complex and realistic reflections.
Enable Global Illumination (GI): GI enhances the interaction between the diamond and its environment, improving the natural lighting and shadows across the entire scene, contributing to a more immersive and nuanced result.
6. Adjust Ambient Occlusion and Anti-Aliasing
To ensure the edges of the diamond remain sharp and free from jagged lines, fine-tuning anti-aliasing settings is crucial.
Anti-Aliasing: Adjust the anti-aliasing (AA) values in the render settings. This helps create smoother and more defined edges, especially in high-reflective areas, preventing pixelation or jagged edges around the diamond’s contours.
Ambient Occlusion (AO): Applying AO helps enhance the shadowing between the diamond and nearby objects, adding depth and dimensionality to the scene by emphasizing subtle shading details.
7. Render Tests and Output Settings
Running multiple render tests ensures that both the diamond texture and HDR lighting are correctly balanced for the final output.
Rendering Format: Opt for rendering formats that support HDR, like EXR or HDR. These formats retain more details and allow for greater flexibility during post-processing.
Post-Processing: After rendering, use tools like Photoshop or After Effects to make fine adjustments to the brightness, contrast, and color of the image. These subtle tweaks can further elevate the visual impact of the diamond.
8. Save Settings and Reuse for Future Projects
For efficiency, save your current HDR and material configurations as presets so you can easily apply them to other projects.
Save HDR Presets: Save your optimized HDR settings to use them in future scenes, ensuring consistency in lighting across various projects.
Save Materials and Textures: Save the diamond materials and textures to streamline your workflow. This allows for quick and easy application of the same settings in other design projects, saving both time and effort.
By optimizing HDR settings for diamond textures in V-Ray, designers can dramatically improve the lighting and overall realism of their renderings, making diamonds appear more authentic and visually captivating. Whether for jewelry design or product visualization, this process enhances the visual depth and impact of your scenes.
For those seeking high-quality HDR images, 3D textures, or models for SketchUp and 3ds Max to create stunning virtual environments, Relebook offers a wide array of resources to help you achieve top-tier visual results in your projects.
