Can I Create Custom HDR Sky Textures for Cinema 4D
When rendering outdoor scenes, the choice of sky textures plays a critical role in setting the mood and lighting effects. Many 3D designers often ask whether it's possible to create custom HDR sky textures in Cinema 4D. In this article, we'll explore how to achieve this and how it can enhance your design workflow.

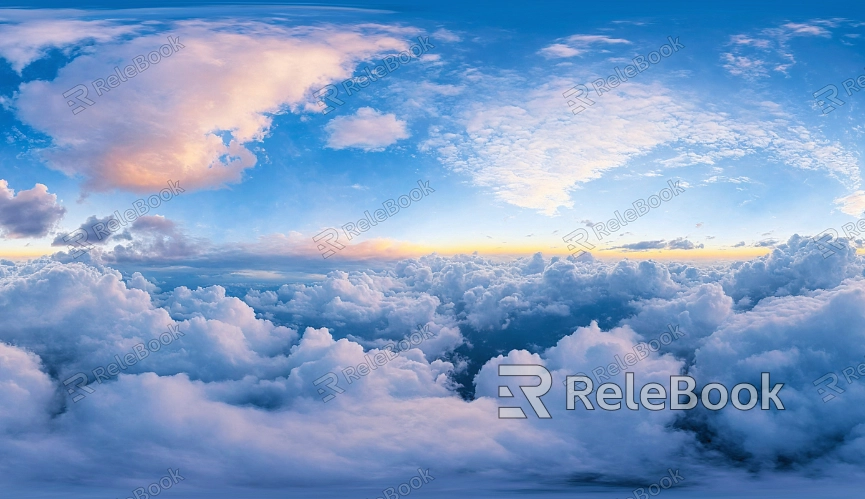
1. Understanding HDR Sky Textures
HDR files are widely used in 3D rendering due to their ability to store a broad range of lighting information. Unlike standard image formats, HDR files retain more detail in both highlights and shadows, making them useful for simulating realistic lighting conditions. In Cinema 4D, HDR sky textures are typically used for environment lighting, providing a comprehensive natural light source while also affecting reflections on objects. Creating custom HDR sky textures allows designers to better control the overall lighting in a scene, achieving results that align more closely with specific project needs.
2. Why Opt for Custom HDR Sky Textures?
While default HDR sky textures can provide basic lighting and reflection effects, they may not always meet the unique needs of certain projects. For instance, in specialized projects, designers might want to simulate the lighting conditions of a particular time of day, weather, or geographic location. In such cases, using custom HDR sky textures can help simulate real-world environments more accurately, boosting the realism of the scene. Additionally, custom HDR textures offer designers more creative freedom, allowing them to adjust the color, intensity, and direction of light to match the style and atmosphere of the project.
3. Common Methods for Creating Custom HDR Sky Textures
There are several ways to create custom HDR sky textures, depending on the designer's needs and the complexity of the project.
Using Photography: Capture panoramic photos on-site and merge them into HDR format. Popular tools include HDR software like Photoshop or Photomatix. This method is ideal for projects requiring accurate simulation of real-world lighting conditions.
3D Software Generation: Some designers use 3D software, such as Cinema 4D or Blender, to create virtual sky environments and render them as HDR files. This approach gives designers complete control over elements like cloud formations, sun positioning, and more.
Modifying Pre-made Assets: If you lack the necessary equipment or are short on time, modifying pre-existing HDR assets is a quick and efficient option. By adjusting the tone, brightness, contrast, and other parameters, you can easily tailor existing HDR sky textures to suit your project.
4. Applying Custom HDR Sky Textures in Cinema 4D
Once you've created a custom HDR sky texture, the next step is to apply it to your Cinema 4D project. Here's how:
Load the Texture: Start by opening Cinema 4D and creating a sky object. In the material editor, load your custom HDR file as the sky texture.
Adjust Exposure and Intensity: After applying the HDR texture, you may need to tweak the exposure and intensity settings to ensure the lighting works well within the scene. This step helps you better control the light distribution across your project.
Control Reflections and Refractions: Custom HDR textures not only impact lighting but also significantly affect the reflections and refractions on objects. Adjusting the reflection parameters can make objects respond more realistically to the surrounding light environment.
5. Optimizing Rendering with Custom HDR Sky Textures
Using custom HDR sky textures can greatly enhance your rendering results in several ways:
Accurate Light and Shadow Effects: Custom HDR textures can simulate real-world changes in light and shadow, resulting in more natural renders.
Improved Detail: HDR files capture more information in bright and dark areas, giving you more flexibility in post-production to make adjustments without losing details due to overexposure or underexposure.
Increased Efficiency: By fine-tuning HDR settings, you can reduce the need for additional light sources, potentially improving the overall rendering efficiency.
6. Key Considerations When Using Custom HDR Sky Textures
When creating and using custom HDR sky textures, keep the following points in mind:
File Size: HDR files tend to be large, so ensure your computer has sufficient storage and processing power to handle them.
Resolution: Choosing the right resolution is crucial. A low-resolution HDR texture can result in blurry skies, negatively affecting the overall render quality, while an excessively high resolution may increase rendering time.
Scene Style Consistency: When creating custom HDRs, ensure that their color scheme and lighting style match the overall aesthetic of your project. Otherwise, the visuals might feel disjointed or out of place.
By mastering these techniques, designers can make more flexible use of HDR sky textures, creating personalized and realistic lighting environments for their projects.
This article has explored how to create custom HDR sky textures in Cinema 4D, from understanding the basics to discussing practical steps and key considerations. Whether you're aiming to boost realism or better control lighting effects, custom HDR textures offer a powerful tool for your design toolkit. If you're looking for more resources on HDR sky textures, 3D textures, or models for SketchUp and 3ds Max, consider visiting Relebook, where you can find a wide range of valuable 3D design assets.
