How to render out bare models blender
Rendering bare models is a useful technique in 3D modeling and animation. This rendering mode displays only the basic geometric shapes of the model without any textures, materials, or details, helping designers and developers clearly view and inspect the model's structure and topology. As a powerful open-source 3D modeling software, Blender provides various tools to achieve this. This article will guide you on how to render bare models in Blender and share some practical tips and suggestions.
Understanding Bare Model Rendering
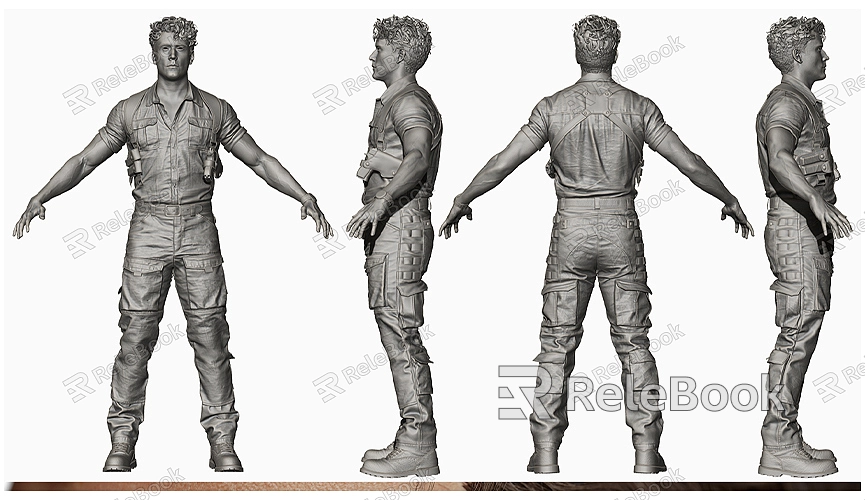
Bare model rendering refers to displaying only the geometric structure of a model without any textures or materials. This rendering approach is typically used for:
- Inspecting Model Structure: Bare model rendering helps you clearly view the geometric structure of a model, identify, and fix topology issues.
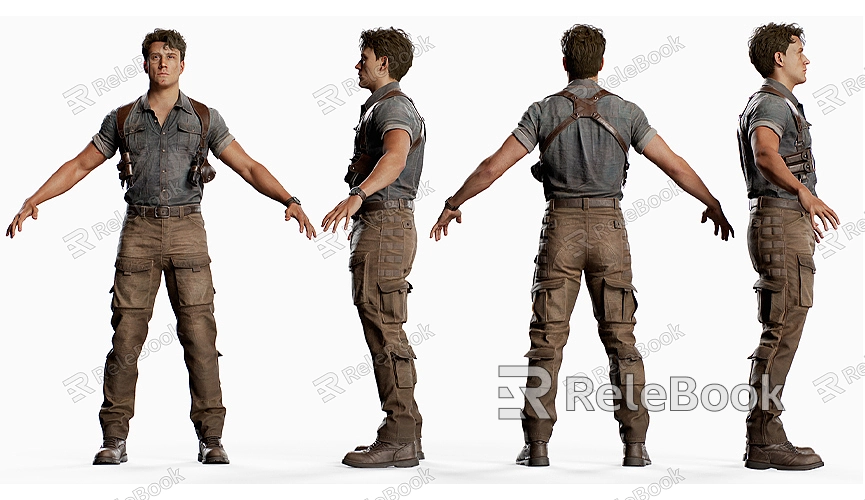
- Showcasing the Modeling Process: Sometimes, you may need to present the modeling process or structure to clients or team members to demonstrate how the model was constructed.
- Preparing for Further Processing: Bare model rendering can serve as a foundational check before further processing or optimization, ensuring the model is free of potential errors.
Setting Up Bare Model Rendering in Blender
Rendering bare models in Blender is quite straightforward. Follow these steps to achieve it:
1. Select the Model: In the 3D Viewport, select the model you wish to render. If you have multiple models, right-click to choose the one you need.
2. Enter Render Settings: In Blender’s right-side panel, locate the “Render” tab. Click the “Render” button to enter the render settings interface.
3. Adjust Material Settings: To render a bare model, you need to ensure the model has no materials assigned. Go to the “Material Properties” panel, check, and remove any materials on the model. You can delete materials by selecting them from the material list and clicking the “-” button.
4. Set Render Mode: In the “Render” panel, select the “Render Engine” option. Blender supports various render engines, such as Cycles and Eevee. Choose your preferred render engine, then set the render mode to “Wireframe” or “Solid.” For bare model rendering, “Solid” mode is generally more suitable as it shows only the basic geometric shapes of the model.
5. Adjust Lighting and Camera Settings: To achieve the best results, adjust your lighting and camera settings. Ensure the lighting is even to clearly showcase the model’s structure. Adjust the camera angle to best display the model’s overall profile.
6. Render the Model: Once the settings are complete, click the “Render” button to start rendering. After rendering, you will see an image displaying only the model’s geometric structure. Adjust render parameters as needed until you achieve the desired effect.
Practical Applications of Bare Model Rendering
Bare model rendering has several practical applications, including:
- Model Inspection: During the modeling process, bare model rendering allows you to quickly check the model’s topology and identify and fix potential errors.
- Design Presentation: When presenting design proposals to clients or team members, bare model rendering can clearly showcase the model’s basic structure and design intent.
- Creating Tutorials or Documentation: If you need to create tutorials or documentation, bare model rendering can serve as a visual aid to explain the model’s structure.
Tips for Optimizing Bare Model Rendering
To achieve better results in bare model rendering, consider the following tips:
- Clean Up the Model: Before rendering, ensure your model is properly cleaned. Remove unnecessary polygons, edges, and vertices for a cleaner render.
- Use Appropriate Render Settings: Choose the right render engine and settings based on your needs. The Cycles engine offers higher quality renders, while Eevee is faster and suitable for real-time previews.
- Adjust Lighting: To ensure the model's details are clearly visible, experiment with different types of lighting and adjust the light’s intensity and position.
Rendering bare models in Blender is a practical and important technique that helps you better inspect and showcase the fundamental structure of your models. By mastering bare model rendering settings and techniques, you can improve modeling accuracy and lay a solid foundation for subsequent design and optimization work. If you need high-quality 3D textures and HDRIs for your models and virtual scenes, you can download them for free from [Relebook](https://textures.relebook.com/). For exquisite 3D models, visit [Relebook](https://3dmodels.relebook.com/), where Relebook offers a wide range of premium 3D resources. Utilizing these resources can enhance your creations and improve efficiency. We hope this guide helps you better use Blender for bare model rendering.
