How do I apply HDR textures in Unity
In 3D modeling and rendering, HDR textures have become an essential tool for enhancing visual quality, especially when creating realistic lighting and environmental effects. Whether you’re working on game development, architectural visualization, or virtual reality, HDR textures are widely used in software like Blender, 3ds Max, Maya, and Unity. For designers using Unity, understanding how to apply HDR textures correctly is critical to achieving high-quality renders.
In Unity, HDR textures are typically used in environments like skyboxes, lighting setups, and reflection probes to simulate realistic lighting conditions. In this article, we’ll go through a few key steps to help you apply HDR textures in Unity and offer some practical tips to help you maximize their potential in your projects.
1. Identifying the use cases for HDR textures
First, you need to identify the specific use cases for HDR textures in your project. HDR textures are most commonly used in:
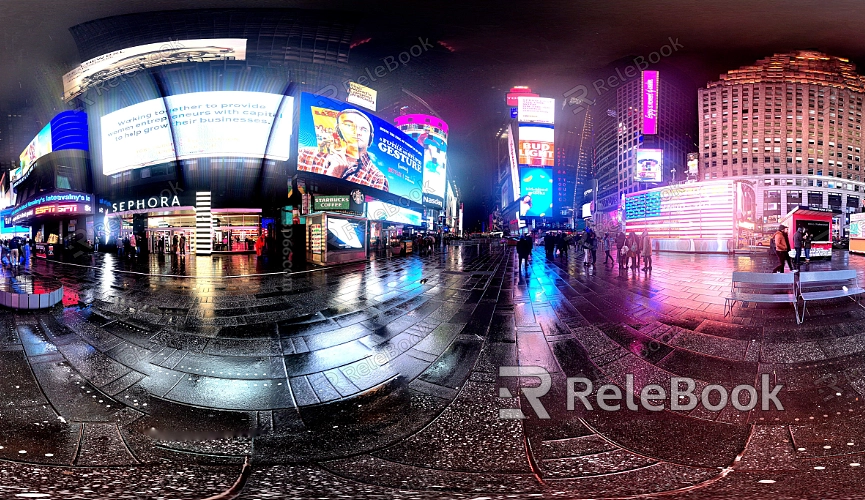
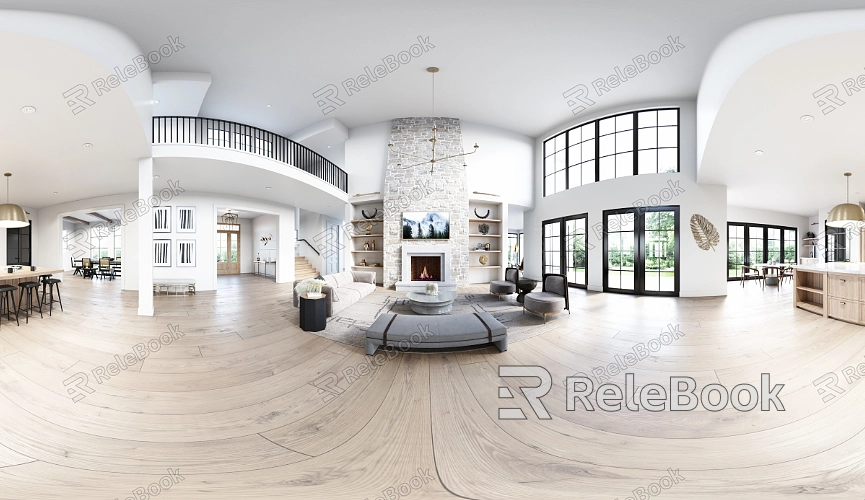
Skyboxes: HDR textures can create realistic sky backgrounds, providing high-quality ambient lighting.
Reflection Probes: These textures enhance reflections, especially in scenes with metallic or reflective surfaces.
Global Illumination: HDR textures help boost the overall lighting in a scene, enhancing brightness and color detail through environmental lighting.
Once you’ve determined where you’ll use HDR textures, the next step is applying them within Unity.
2. Importing HDR textures
To use HDR textures in Unity, you first need to import them into your project:
Open the Unity editor and select Assets > Import New Asset.
Browse and select your HDR texture files (typically in .hdr or .exr format), then import them into the project.
In the import settings, ensure the Texture Type is set to either Cubemap or 2D Texture, depending on your needs.
Unity supports various formats for importing HDR textures, but .hdr or .exr is generally recommended to ensure high quality.
3. Applying HDR textures to a skybox
Applying HDR textures to a skybox is a common practice in Unity. To set this up:
In the Unity editor, go to Window > Rendering > Lighting.
In the Lighting settings, find the Skybox Material field, then click the circle icon to select a material.
Create a new material and set its shader type to Skybox/Cubemap.
Drag your imported HDR texture into the material’s texture slot.
Finally, assign this material to the Skybox Material in your scene.
Your HDR texture will now be successfully applied to the skybox, creating a realistic lighting environment for your scene.
4. Adjusting lighting settings
Proper lighting adjustments are crucial to getting the most out of HDR textures in Unity:
Make sure HDR mode is enabled in the Lighting Settings.
Tweak the exposure settings to optimize lighting intensity and avoid over-bright or dim areas.
If you’re using reflection probes, ensure their texture maps are set to HDR to maintain accurate reflections.
Fine-tuning your lighting can significantly enhance the depth and detail of shadows and highlights in your scene.
5. Optimizing HDR texture performance
HDR textures can be resource-intensive, so optimizing their performance is essential:
Adjust the Texture Compression settings when importing HDR textures to reduce file size and memory usage.
Use different levels of detail (LOD) settings to prevent distant or non-essential elements from consuming unnecessary resources.
Configure platform-specific optimization settings to ensure smooth performance on mobile or lower-end devices.
These optimization steps help you balance visual quality and performance.
6. Using HDR textures for reflections and lighting
HDR textures are particularly useful for creating realistic reflections in your scene:
Add reflection probes to your scene, and in the probe’s Reflection Cubemap option, apply the HDR texture.
Ensure the probe is placed appropriately to capture relevant environmental reflections, especially around glass or metallic surfaces.
This approach greatly improves the realism of reflections in your project.
7. Applying post-processing effects
Once your HDR textures are in place, using Unity’s post-processing stack can further enhance the rendered scene:
Enable Bloom to highlight bright areas in the HDR textures, adding more depth and realism to the lighting.
Use Color Grading to fine-tune the scene’s tones, making the colors of the HDR textures more vibrant and balanced.
Post-processing effects help make your final output look polished and professional.
8. Verifying texture display
After applying HDR textures in your scene, it’s essential to verify they are displaying correctly:
Check the HDR texture display in Game View, and adjust exposure and brightness settings to achieve the desired look.
Ensure the textures look accurate from different angles and distances, especially in brightly lit scenes, to avoid color clipping or distortion.
Proper verification ensures that your final render will display as intended.
By following these steps, you can successfully apply HDR textures in Unity, elevating the lighting, reflections, and overall visual appeal of your scenes. HDR textures not only help create more lifelike environments but also provide consistent, high-quality results across various projects. If you’re looking to discover more resources or get additional tips, feel free to visit Relebook for tutorials and curated HDR texture libraries to enhance your workflows further.
