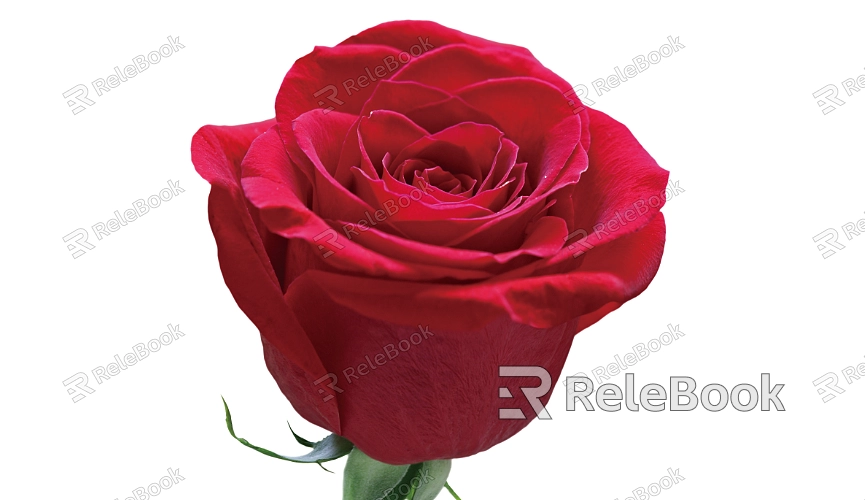
How to Make a 3D Flower Texture in GIMP
Creating 3D flower textures is essential in 3D design, adding a natural beauty and realism to various scenes. This technique is widely used in fields such as interior decor, garden design, character costume design, and outdoor environment rendering. Popular 3D software like Blender, 3ds Max, and Maya support flower textures, while image editing software like GIMP offers powerful tools for editing and refining textures. This guide will walk 3D designers through creating realistic 3D flower textures in GIMP, covering everything from basic design to fine-tuning for optimized rendering results.

Analyzing Floral Material Characteristics
Before starting, it’s helpful to analyze key characteristics of floral materials, including color, texture, and shape. Understanding these aspects can help create a texture that captures the natural beauty of flowers.
Color and Gradient
Flowers come in unique colors and gradient effects. Select vibrant colors like pink, yellow, and red, using GIMP’s gradient tool to create smooth transitions from the center of the petal to the edges for a realistic color shift.
Texture Details
Most petals have a slight sheen and veining. Mimic these textures by adding subtle roughness to reflect real petal surfaces.
Shape Reference
When creating textures, choose common flower types like roses, lilies, or sunflowers, and observe their specific shapes and structures. This approach helps the texture closely resemble real flowers.
Building a Base Flower Texture
New File Setup and Color Choice
Open a new file in GIMP, selecting a base color similar to the flower. Use the “Levels” or “Brightness-Contrast” tool for fine-tuning the color, adding initial color gradients for realistic petal transitions.
Transparency Effects
Some petals have transparency. Adjust the opacity of layers to achieve this effect, softening colors for natural translucency in the final render.
Adding Petal Texture Details
Detailing can significantly enhance the realism of the petals. Use GIMP’s brush tool or overlay images for adding veins, folds, and slight roughness.
Vein Detailing
Choose a fine brush to hand-draw delicate vein lines or import free petal vein textures. Adding veins as separate layers can save time and create a more detailed look.
Creating Folds
Use GIMP’s “Warp” or “Distort” filters to add small folds to the petal texture, creating a more natural, lifelike look.
Adjusting Roughness
Overlay a “Noise” or “Texture” layer, reducing opacity to bring subtle roughness to the surface, simulating the petal’s natural feel.
Adding Subsurface Scattering Effects
Simulating subsurface scattering in GIMP can enhance the petal’s thickness and glow, making it appear softer when lit.
Setting Colors
Create a warm color layer to overlay the petals. Adjust layer mode and opacity for a soft, translucent glow.
Soft Light Blending
Using “Soft Light” or “Overlay” blend modes enhances the petal’s light response, creating natural-looking shadows and highlights.
Applying Displacement and Bump Effects
Use displacement maps to add depth and detail to the petal’s surface.
Creating Displacement Maps
Copy the petal texture, adjusting brightness and contrast to make a black-and-white displacement map. Apply this map to increase the petal’s surface detail.
Setting Bump Strength
Slightly adjust bump settings to avoid excessive depth, as too much can make the petals look unnatural.
Using Gradient and Blending Techniques
Color gradients and blending tools can bring more life to the petals, adding color depth and transitions.
Gradient Transitions
Add color gradients from the petal center to edges, using the gradient tool for smooth transitions.

Color Blending
Adjust “Hue-Saturation” to create subtle color changes across different petal areas, enhancing depth and realism.
Adding Fine Details to Stamens
To increase realism, add fine details like hair or pollen around the stamen.
Particle Effects
Use GIMP’s particle brushes or noise tools to add tiny spots or speckles, representing pollen grains or fine hairs.
Density and Opacity Adjustments
Adjust particle opacity and density to keep the texture natural. Use smaller dots or strokes for a more refined look.
Lighting and Rendering Adjustments
Lighting is crucial to showcase petal texture effectively, and adding soft, natural lighting can bring out the petal’s layered details.
Soft Light Source
Choose a gentle side or backlight to highlight the petal’s slight translucency, making it more dimensional and natural.
Angle Testing
Test lighting from various angles to observe shadow and light transitions, ensuring realistic texture behavior.
Testing and Applying Texture in 3D Scenes
Finally, apply the flower texture to a 3D model and test its look in a virtual environment.
Texture Scaling
Scale the texture appropriately to maintain detail. Adjust texture resolution as necessary.
Environmental Testing
Test the texture in different lighting conditions to ensure it retains realism across scenes.
Following these steps in GIMP, designers can create 3D flower textures that add vibrant detail and depth to 3D scenes. This guide is crafted to help 3D artists master the art of floral texture design in GIMP. For those seeking more high-quality texture resources or 3D models compatible with SketchUp or 3ds Max, Relebook offers a range of assets to support creative projects and elevate visual designs to new levels.

