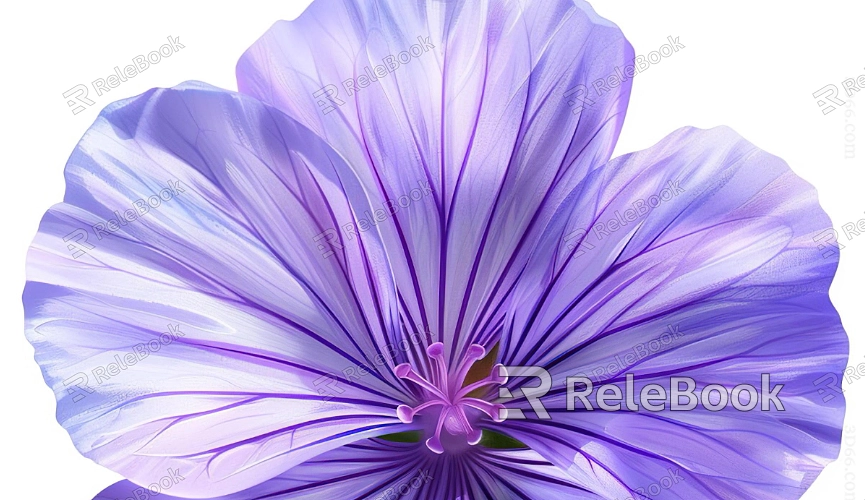
How to Make a 3D Flower Texture
Flower textures add natural beauty and realism to 3D scenes, making them ideal for interior decor, garden design, character clothing, and outdoor environment rendering. Commonly used software like Blender, 3ds Max, and Maya support the creation and application of flower textures. This article details how to create a 3D flower texture, from basic design to detail enhancement, helping designers achieve realistic, dimensional floral effects.

Identify the Flower’s Material Properties
Start by analyzing the flower’s features, such as color, texture, and shape. These characteristics are essential to recreating the natural beauty of flowers in 3D.
Color and Texture: Different flowers have unique colors and patterns. You might select bright colors like pink, yellow, or red, with a gradient effect or slight transparency to capture the petal’s natural look.
Surface Texture: Petals usually have a delicate sheen and natural veins, giving them a soft but uneven texture. Adding subtle roughness and bump details can recreate this realistic texture.
Shape and Structure: Flowers come in many forms, so consider a specific type, such as a rose, sunflower, or lily, and focus on the petal and stamen structure to ensure accurate detail.
Create the Base Flower Texture
Begin building the base material in Blender or 3ds Max to set a solid foundation for the flower texture.
Set Base Color: Use the material editor to select a base color that closely matches the flower’s real-life hue. Avoid overly saturated tones. Shading models like “diffuse” or “subsurface scattering” can create the petal’s soft lighting.
Adjust Transparency: Petals often have a slight transparency. Adjust the transparency channel to allow light to pass through petals, creating a soft and natural effect.
Add Texture Details
Adding detailed textures like petal veins, tiny folds, and roughness significantly enhances realism.
Using Maps: Find a petal vein texture or create one manually in Photoshop with gradient veins. Add it to the material’s bump or normal map to emphasize surface details.
Subtle Roughness: Adjust roughness for a slight matte effect that enhances the petal’s natural look. Blender’s “noise texture” or “cloud texture” nodes can be adjusted in scale and strength to mimic the petal’s subtle irregular roughness.
Introduce Subsurface Scattering Effects
Since petals show some translucency in sunlight, adding subsurface scattering (SSS) can make petals appear thicker and softer.
Color and Radius: In Blender, set the “subsurface color” and “subsurface radius” to simulate light passing through petals. Increasing this effect can make the petal appear warm and soft.
Control Intensity: Avoid setting SSS too high; slight adjustments provide a natural lighting effect.
Use Displacement Maps for Depth
Displacement maps add dimension by creating height variations, enhancing the flower’s lifelike surface.
Find or Create a Displacement Map: Fine height variations can mimic petal structure, giving a realistic feel.
Adjust Displacement Strength: Set displacement strength moderately to prevent overdone effects, balancing depth without exaggeration.
Apply Gradient and Color Blending
Color gradients and blending techniques add vibrancy, making petals appear more naturally detailed.
Gradient Colors: Use gradient colors between the petal edges and center, which can be achieved using gradient nodes, making petals look more dynamic.
Color Blending: The color mix node lets you create slight variations within petal areas, giving the texture an added sense of dimension.

Add Fine Hair or Stamen Details
Adding fine details like petal hair or stamen structures with a particle system makes the texture naturally authentic.
Particle System: Use Blender’s particle system to add pollen or hair on the stamen for a realistic touch.
Render Test: Adjust particle density and distribution, testing different lighting to ensure clarity from all angles.
Lighting and Rendering Adjustments
Lighting plays a critical role in flower texture presentation, with effective lighting arrangements highlighting petal textures.
Soft Lighting: Choose soft lighting options in Blender or 3ds Max. Side lighting enhances petal veins and subsurface effects.
Multi-angle Testing: Experiment with lighting from various angles to ensure the petal textures are well-defined from every view.
Apply Texture to a Scene for Testing
Place the flower texture onto a 3D flower model in your scene and observe how it integrates with the surroundings.
Texture Scaling and Adjustments: Adjust the texture’s scale and transparency according to the flower model’s size, ensuring petal details remain clear from different perspectives.
Preview in Different Environments: Test the texture under various lighting conditions to ensure it retains realism in diverse scenes.
Following these steps to construct a flower texture can effectively boost a 3D flower model’s authenticity. Creating 3D flower textures requires careful attention to layering and detail, with iterative adjustments for optimal results. This guide aims to help designers understand and master flower texture creation, encouraging them to explore diverse material techniques in their work.
If you’re looking for high-quality 3D textures, or SketchUp and 3ds Max models for your project, Relebook offers a wide selection of resources, helping you achieve outstanding visual effects in your scenes.

