How to Make a Texture Map in Blender?

Prepare Your Model
Before working on textures, make sure your 3D model is ready. This includes any necessary modeling and sculpting work to get the shapes and proportions just right.
Create a Material
Select Your Model: In the 3D View, select the model you want to apply textures to.
Open Material Properties: Go to the Properties panel (usually on the right side of the screen) and click the "Material" tab.
Add a New Material: Click the "New" button to create a new material for your model.
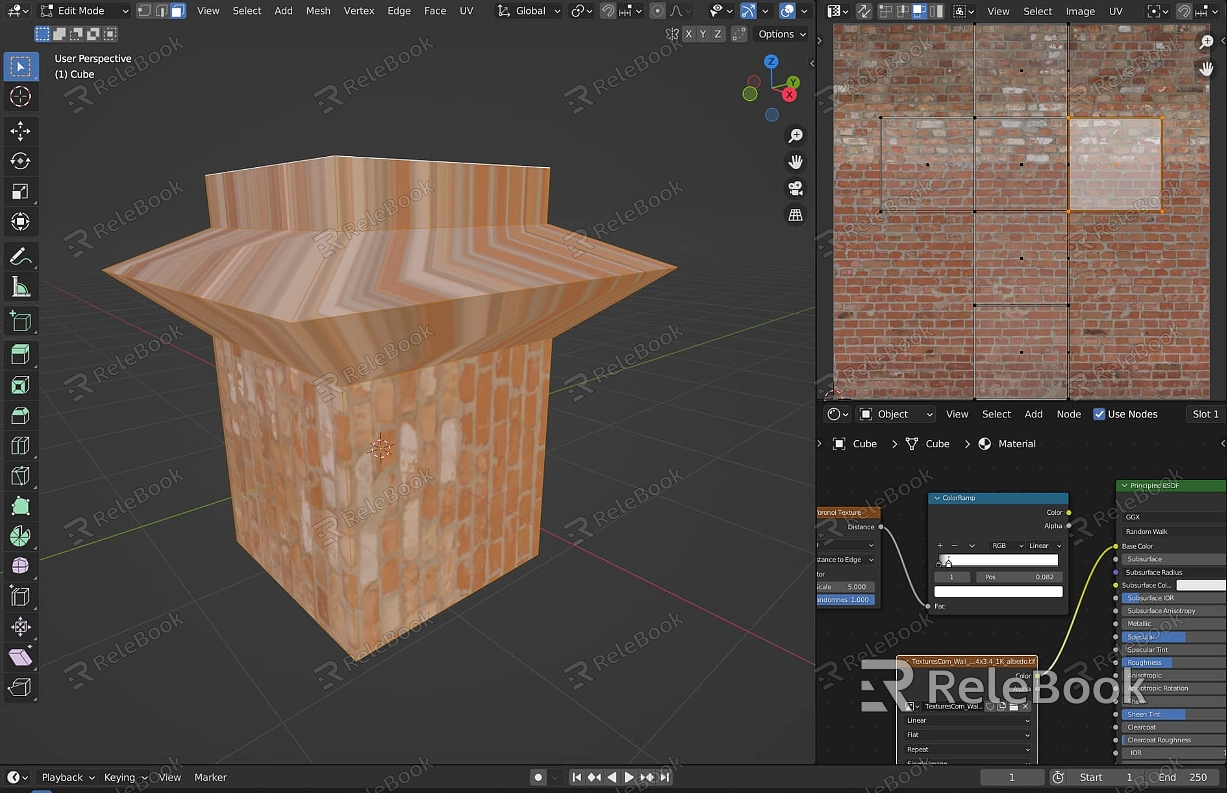
Add a Texture
Choose Texture Type: In the Material Properties, scroll down to the "Texture" section and click "Add Texture" to add a new texture slot. Choose the type of texture you want (e.g., Image Texture for bitmap images).
Import Your Texture Image: Click the "Open" button next to the image field and select your texture image from your file system.
Adjust Texture Settings
In the Texture Properties, you can adjust various settings, such as the texture's color, mapping coordinates, and blending mode. For example, you may need to adjust the texture's scale and offset to better fit your model.
Create a UV Map
UV mapping is the process of projecting your 3D model's surface onto a 2D plane, allowing you to accurately apply textures.
Enter Edit Mode: Select your model and press the Tab key to enter Edit Mode.
Select Faces: In Edit Mode, select the faces you want to UV unwrap. You can press A to select all faces.
Unwrap UV: Press the U key and choose an unwrapping method from the menu. "Smart UV Project" is a good starting point for most models.
Adjust UV in UV/Image Editor: After unwrapping, your model's UV will appear in the UV/Image Editor. Here, you can adjust the UV layout to optimize texture usage and reduce distortion.
Apply the Texture
With the UV settings complete, you can now see your texture applied to your model in the 3D View. Adjust the material's shader nodes as needed to achieve the desired appearance.
FAQ
How do I set up a texture map in Blender?
To set up a texture map in Blender, you need to create a material, add a texture to that material, and adjust its settings. Additionally, you need to create a UV map for your model to accurately project the texture onto its surface.
How do I create a texture map?
Texture maps are usually created in image editing software like Photoshop or GIMP. Once you have a texture image, you can import it into Blender and apply it to a material as described above.
How do I remap textures in Blender?
To remap textures in Blender, you need to adjust your model's UV mapping. This involves selecting the faces you want to remap, re-unwrapping them using different methods, or manually adjusting their UV coordinates in the UV/Image Editor.
How do I create a UV texture map in Blender?
Creating a UV texture map in Blender involves selecting the faces of the model you want to unwrap, entering Edit Mode, and using the unwrap function (press U and choose a method). This will project your model's surface onto a 2D plane, allowing you to apply textures accurately. Then, you can adjust the UV layout in the UV/Image Editor to optimize texture usage and reduce distortion.
