How to Reach Render Screen in New Blender
Blender is a powerful 3D modeling and rendering software that continuously improves its interface and features with each update. New users or those upgrading from older versions might find it confusing to access the render screen. This guide will detail how to quickly reach the render screen in the new Blender and share some useful rendering tips.
Open Blender and Import Your Scene
First, launch Blender and open the project file you want to work on. If you don't have a project file, you can create a simple cube, sphere, or other geometry by pressing `Shift + A` and selecting an option from the "Add" menu under "Mesh."
Switch to Rendered View
In Blender, you can view and edit your model from multiple perspectives. To enter the rendered view, follow these steps:
Using Shortcuts
Press and hold `Z`, then choose "Rendered" from the pop-up menu. This switches the viewport to render mode, allowing you to preview the render effects in real time.
Using Display Mode Icons
In the top-right corner of the 3D Viewport, you'll find a set of display mode icons. From left to right, they are: "Wireframe," "Solid," "Material Preview," and "Rendered." Click the "Rendered" icon on the far right to switch to the rendered view.
Adjust Render Settings
Once in the rendered view, you can adjust render settings as needed to achieve the best results.
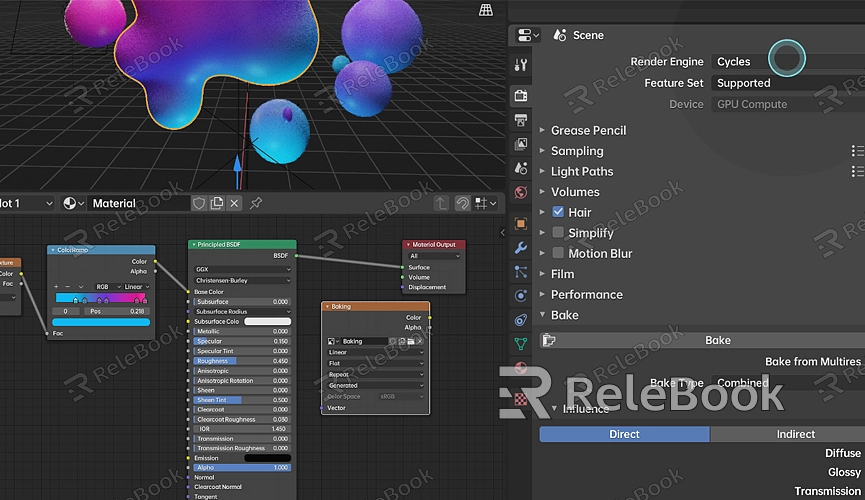
Set the Render Engine
In the Properties panel on the right, find the "Render Properties" tab. By default, Blender uses the Eevee render engine. For higher-quality renders, you can switch to the Cycles render engine. Click the drop-down menu under "Render Engine" and select Cycles.
Adjust Sample Count
The number of samples determines the render quality and speed. More samples result in better quality but take longer to render. In the "Render Properties" tab, find the "Sampling" section. You can set different sample counts for preview and final render. Use lower sample counts for previews and higher counts for the final render to achieve the best quality.
Enable Denoising
High sample renders can result in noise. To reduce noise, enable the denoising feature. In the "Render Properties" tab, find the "Denoising" section and enable it.
Render and Save Image
After setting up everything, you can start rendering the image and save the result.
Start Rendering
From the top menu bar, select "Render" and then click "Render Image." Blender will start rendering the current scene and display the result in a new window.
Save Rendered Result
After rendering is complete, in the render result window, choose "Image" from the menu, then click "Save As." Choose the save location and file format, and click the "Save" button.
Tips to Enhance Render Quality
To achieve better rendering results in Blender, consider the following tips:
Use High-Quality Textures and HDRI
High-quality textures and HDRI (High Dynamic Range Images) can significantly enhance render quality. If you need a variety of high-quality 3D textures and HDRI for creating models and virtual scenes, you can download them from Relebook. After downloading, import the textures and models directly into Blender for optimal results.
Adjust Lighting Settings
Lighting settings greatly affect render quality. Try adding multiple light sources and adjusting their positions, intensities, and colors to achieve the desired lighting effect. Using environment lighting and HDRI can also add more detail to the scene's illumination.
Optimize Material Settings
Material settings directly impact the appearance of objects. In the material properties, adjust parameters like reflection, refraction, and roughness to make objects look more realistic. Using the Shader Editor, you can create complex material effects to enhance the visual quality of your work.
Reaching the render screen and performing rendering operations in the new Blender is straightforward. By following these steps, you can easily render images and save the results. Additionally, adjusting render settings and optimizing materials and lighting can significantly improve render quality. If you need high-quality 3D textures, HDRI, or 3D model downloads, you can find them on Relebook and import them directly into Blender for the best results.
