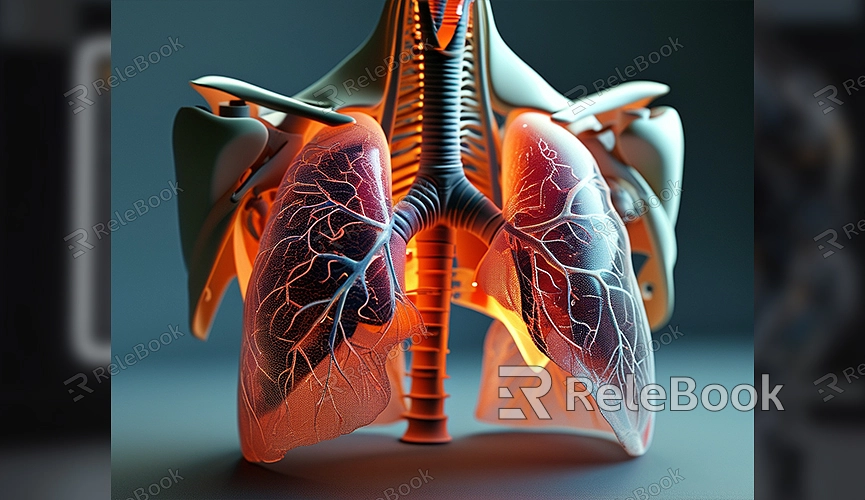
How to Make a 3D Lung Model
3D lung models are widely used in medical and educational fields for teaching and research. Creating an accurate 3D lung model not only helps medical students better understand lung anatomy but also provides detailed anatomical information for virtual reality and animations. This article will guide you through the process of creating a 3D lung model using tools like Blender and offer some practical tips.
Preparation
Before starting, you need to gather some resources and tools. You can refer to anatomy books or use existing medical images to obtain detailed structural information about the lungs. Once you have these resources, you can begin creating the model using a 3D modeling software like Blender.
Steps to Create a 3D Lung Model
1. Create the Basic Shape
Open Blender and start a new project. Begin by creating the basic shape of the lungs. You can start with a simple cube or sphere and then use Blender’s editing tools to adjust it. The shape of the lungs is irregular, so you’ll need to carefully adjust the proportions and contours of the model to closely match the real lung structure.
2. Refine the Model
Once the basic shape is complete, start refining the model. This includes adding details such as lung lobes, bronchi, and other internal structures. Blender’s sculpting tools can help you create more complex details. Sculpt according to anatomical diagrams or medical images to ensure each part of the model is accurate.
3. Add Textures and Materials
Next, add textures and materials to the model. Use Blender’s material editor to apply different textures to simulate real lung tissue. Choosing appropriate texture mapping and material settings can make the model look more realistic. At this stage, you may need to perform UV unwrapping to properly fit the textures onto the model.
4. Optimize and Test
After completing the model and textures, optimize and test the model. Check each detail of the model to ensure there are no errors or inconsistencies. Perform rendering tests in Blender to see the model’s appearance. Make adjustments and improvements as needed to enhance the model’s quality and accuracy.
5. Export the Model
Finally, export the completed 3D lung model in common 3D formats like OBJ or FBX. These formats are compatible with other software and platforms. If you plan to use the model for virtual reality or other applications, ensure you select the correct export settings to maintain the model’s quality and details.
Tips for Enhancing Model Quality
To improve the quality of your 3D lung model, consider the following tips:
- Reference Materials: Use high-quality medical images and anatomy books as references to ensure the accuracy of the model.
- Detail Sculpting: During the sculpting phase, strive to capture the real structure of the lungs, such as fine bronchial branches and alveoli.
- Texture Mapping: Choose high-resolution texture maps to enhance the model’s visual effect. You can download high-quality 3D texture resources from the internet.
Creating a 3D lung model is a complex but rewarding process. By following these steps, you can produce a detailed and accurate 3D lung model for educational, display, or other purposes. If you need high-quality 3D textures, HDRIs, or model downloads for your projects, you can find them on Relebook. Download the textures and 3D models and import them directly into your project. These resources will greatly simplify your modeling process and improve the overall quality of your model.
