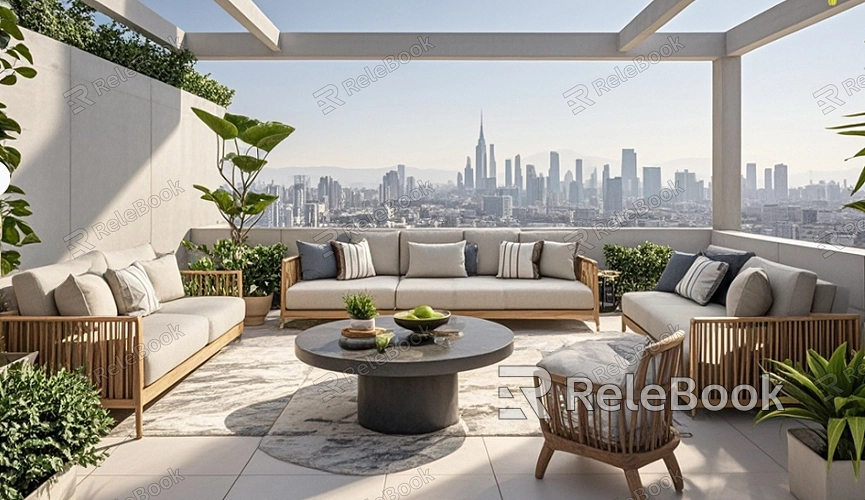
How to Create a 3D Model of a Terrace?
In modern architecture and interior design, the use of 3D models is becoming increasingly popular. The terrace, as an essential link between indoor and outdoor spaces, significantly impacts the overall aesthetic and functionality of the environment. Creating a 3D model of a terrace not only helps designers showcase their creativity but also allows clients to preview the outcome. This article will provide a detailed guide on how to create a 3D model of a terrace, covering design preparation, tool selection, modeling steps, and more, helping you easily produce a terrace model.
Define the Design Concept
Before starting the creation of a 3D model, it is crucial to clarify the design concept for the terrace. Consider the following aspects:
Functional Requirements: Will the terrace be used for relaxation, gatherings, or gardening? Different functions will affect the layout and element choices.
Style Direction: Modern, traditional, rustic, or minimalist? Determining the style will assist in selecting appropriate materials and colors later.
Space Dimensions: Measure the actual area of the terrace to understand spatial limitations and possible designs.
By considering these factors, you can form a clear design vision, laying a solid foundation for subsequent modeling work.
Tool and Software Selection
Creating a 3D model requires suitable tools and software. Here are some commonly used modeling software options:
SketchUp: Easy to use, ideal for beginners, and offers a wide range of plugins and model libraries.
AutoCAD: Powerful and suitable for complex designs, allowing for precise drawing and editing.
Blender: An open-source software that caters to professional design, featuring comprehensive functions, including rendering and animation.
3ds Max: Suitable for high-quality rendering and animation production, widely used in architecture and film industries.
Choose the appropriate software based on your needs and familiarity to start modeling.
Gather Reference Materials
Collecting relevant reference materials during the design process can greatly enhance the quality of the model. You can find inspiration through the following channels:
Online Resources: Design works on platforms like Pinterest and Behance.
Architecture Magazines: Explore the latest design trends and case studies.
Site Visits: Visit well-designed terraces to observe and photograph details, taking note of specifics.
Using reference materials, you can gain additional creative insights that elevate your design skills.
Establish the Base Model
Once you have determined the design concept, you can start creating the base 3D model. Here are some basic steps:
Draw the Floor Plan: Create a floor plan of the terrace in the software, marking key functional areas and the placement of primary elements.
Create 3D Shapes: Use the software’s tools to transform the floor plan into a 3D model, constructing the basic floor, walls, and railings.
Add Details: Gradually incorporate details according to the design concept, such as furniture, plants, and lighting fixtures.
Throughout this process, continuously check the model’s proportions and details to ensure they align with actual conditions.
Choose Materials and Textures
The selection of materials and textures directly affects the realism of the model. At this stage, consider the following aspects:
Floor Material: Choose materials like wood, tile, or stone based on the design style.
Furniture and Decorations: Select suitable materials for furniture and decor, ensuring consistency with the overall style.
Lighting Effects: Add lighting elements to the model to simulate different lighting conditions, enhancing the visual experience.
By thoughtfully selecting materials and textures, your terrace model will become more appealing.
Rendering and Output
After completing the modeling process, the final step is to render and output the model. Rendering can bring your model to life and showcase its realistic effects. Here are some basic steps for rendering:
Select Rendering Settings: Adjust resolution, lighting, and shadow effects according to your needs.
Preview rendering: Check the results and adjust any unsatisfactory aspects.
Final Render Output: Produce high-quality rendered images for presentation and marketing.
The rendering process may take some time, so be patient while waiting for the final result.
By following the steps outlined above, you can successfully create a 3D model of a terrace. The design process is both a journey of creation and a form of artistic expression. I hope you find joy in this process and enhance your design skills. Finally, feel free to visit the Relebook website to download more exquisite 3D models and textures to support your creative journey.
FAQ
How do I start creating a 3D model of a terrace?
First, clarify your design concept, choose the appropriate software, and then begin modeling by drawing the floor plan.
What software is suitable for creating a 3D model of a terrace?
Consider using SketchUp, Blender, or 3ds Max, as these programs are powerful and relatively easy to learn.
How do I choose materials and textures for the terrace model?
Select materials based on the design style, ensuring they coordinate with the overall layout and color scheme.
What should I do if I encounter problems during rendering?
Check the rendering settings to ensure correct lighting and material configurations, and consult the software’s help documentation.
Where can I use the completed 3D model of the terrace?
It can be used for project presentations, client discussions, and the creation of visual effects.
