How to Create Texture Maps in Photoshop?
Texture mapping can enhance the visual appeal of a 3D model or design project by adding depth, detail, and realism. So, how do we create texture maps in Photoshop? In this article, we'll walk you through six key points to help you master this skill.
Understanding Texture Maps
Before diving into the creation process, let's define what texture maps are. Texture maps are images that contain information about the surface properties of an object, such as its color, roughness, bumps, and more. They are commonly used in 3D modeling and game development to add detail to objects without significantly increasing the polygon count.
Gathering Materials and Inspiration
The first step in creating a texture map is to gather the necessary materials and inspiration. This might involve taking your photographs of textures, downloading royalty-free images from the internet, or using painting techniques to create unique textures from scratch.
Creating a Base Texture
Import Your Materials: Open Photoshop and import the images you've gathered.
Compose the Texture: Arrange and blend the images to create a cohesive texture. You might use layer masks, blending modes, or the Clone Stamp and Healing Brush tools to refine your texture.
Adjust Colors and Contrast: Use Photoshop's adjustment layers to enhance the colors, contrast, and overall appearance of your texture.
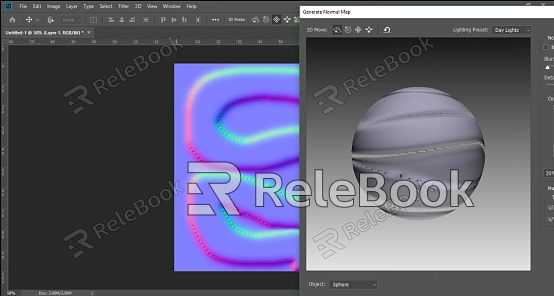
Making Normal Maps in Photoshop
Normal maps are a type of texture map that stores information about the direction of surface normals, allowing for the simulation of lighting and shadows without adding geometric detail.
Prepare Your Image: Ensure your texture is in grayscale, as normal maps are based on the intensity of light and shadow.
Apply a Filter: Use the "Filter Gallery" or "Filter" menu to apply a filter that creates a height map, such as the "Find Edges" filter.
Convert to Normal Map: There are several ways to convert a height map to a normal map, including using third-party plugins or online tools. In Photoshop, you can manually adjust the colors of the height map to mimic a normal map's color encoding.
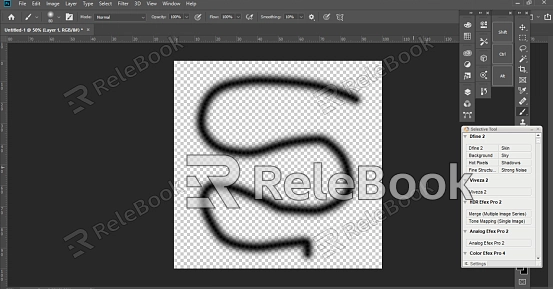
Creating Bump Maps in Photoshop
Bump maps are similar to normal maps but are used to simulate surface height variations directly, rather than through lighting effects.
Duplicate Your Texture: Start with a copy of your base texture.
Apply Height Effects: Use filters like "Displace" or "Wave" to add height variations to your texture. Alternatively, you can manually paint in height information using the Brush Tool and layer styles.
Adjust the Bump Intensity: Use layer opacity or blending modes to control the visibility and intensity of the bump effects.
Saving and Using Your Texture Maps
Once you've created your texture maps, be sure to save them in the appropriate format. Common formats for texture maps include PNG, JPEG, and TGA.
With the above introduction, I believe you have learned how to create texture maps in Photoshop. If you need to download high-quality texture maps or 3D model assets, you can get them from Relebook.
FAQ
How do I map a texture in Photoshop?
Mapping a texture in Photoshop typically refers to applying a texture image to a 3D model or object within Photoshop's 3D features (if available) or in a 3D modeling software. However, in a broader sense, mapping a texture can also mean aligning and positioning a texture image within a layer or smart object in Photoshop. To do this, you might use the Move Tool (V) to position the texture, adjust the layer's transform properties, or use layer masks to blend the texture with the underlying image.
How create texture maps?
Creating texture maps involves gathering materials, composing a base texture, and adjusting it to fit your needs. This might include using filters, blending modes, and layer styles to enhance the texture's appearance. You can also create specialized texture maps like normal maps and bump maps to add even more detail and realism to your projects.
How to make a normal map texture in Photoshop?
Making a normal map texture in Photoshop involves starting with a grayscale image that represents height information. You can then apply filters or manually adjust the image to create a height map, which is then converted to a normal map using techniques like color encoding.
How to create bump maps in Photoshop?
Creating bump maps in Photoshop involves adding height variations to a texture image. This can be done using filters like Displace or Wave, or by manually painting in height information using the Brush Tool and layer styles. Adjusting the bump intensity with layer opacity or blending modes allows you to fine-tune the effect.
