How to Render a Computer tig in Blender
Rendering a computer rig model in Blender can be challenging, but by mastering some key techniques and processes, you can easily create realistic renderings. This guide will explain how to render a computer rig model in Blender and provide practical tips to enhance your rendering results.
Preparation
Before you start rendering, make sure you have the latest version of Blender installed. You can download and install it from the Blender official website. Next, you'll need a 3D model of a computer rig. If you don't have a model ready, you can find free model resources online or create one yourself.
Import the Model
Open Blender and go to the “File” menu, select “Import,” and choose the appropriate file format (e.g., OBJ, FBX). Import your 3D computer rig model into Blender. After importing, check the model for completeness and ensure there are no missing parts or errors.
Set Up Materials and Textures
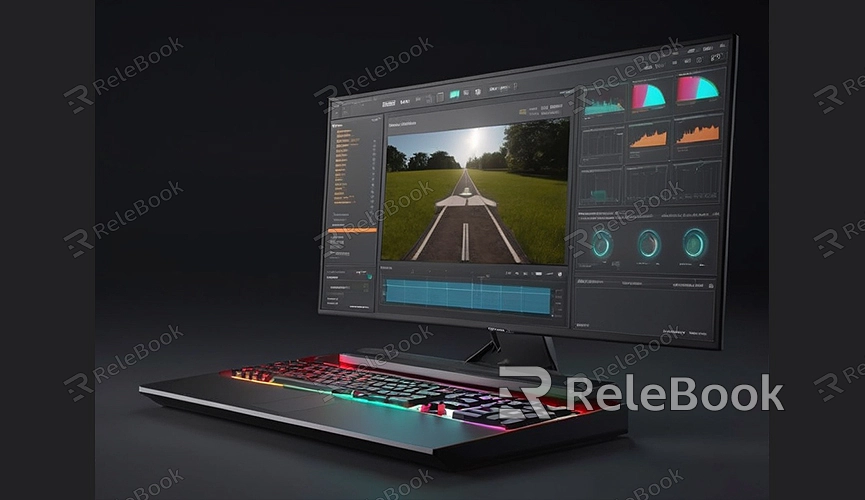
To make your model more realistic, you need to apply appropriate materials and textures to different parts of the model. For example, you can use a metal material for the computer case and a glass material for the monitor. Blender offers a wide range of material editing tools that allow you to adjust parameters such as color, glossiness, and reflectivity.
If you need high-quality 3D textures, HDRIs, or model downloads for your projects, Relebook is a great resource. After downloading, you can directly import these textures and models into Blender to enhance your model.
Set Up Lighting
Lighting is a crucial aspect of rendering. You can add different types of light sources in Blender, such as point lights, parallel lights, and spotlights. Depending on the specifics of your computer rig model, choose the appropriate light source types and adjust their positions, intensities, and colors. Properly configured lighting can significantly enhance the rendering effect.

Adjust Camera Angles
Setting up camera angles in Blender helps you capture the best view of your model. You can achieve the desired perspective by moving, rotating, and adjusting the camera's focal length. Once the camera is set up, preview the model from the camera's perspective to ensure that all important details are in the frame.
Apply Rendering Settings
Before starting the render, adjust some rendering settings. Open the “Render Properties” panel, select the appropriate rendering engine (such as Cycles or Eevee), and adjust parameters such as resolution, sampling, and ray tracing. Choose a balance between rendering quality and speed based on your computer rig.
Start Rendering
Once all parameters are set, you can begin rendering. Click the “Render” button, and Blender will start processing and generating the rendered image. The rendering process may take some time depending on the complexity of the model and the rendering settings. After rendering is complete, you can save the image and proceed to post-processing.
Post-Processing
After rendering, you can use Blender's built-in compositor or other image editing software (such as Photoshop) for post-processing. Post-processing can make your rendered image more vivid and realistic. Common post-processing tasks include color adjustments, adding light effects, and sharpening details.
By following these steps, you can successfully render a realistic computer rig model in Blender. Mastering these techniques will not only improve your rendering skills but also help you make significant progress in 3D modeling and rendering. If you need high-quality 3D textures, HDRIs, or model downloads for your projects, Relebook is an excellent resource. Downloading and importing these textures and models into Blender will greatly enhance your work.
