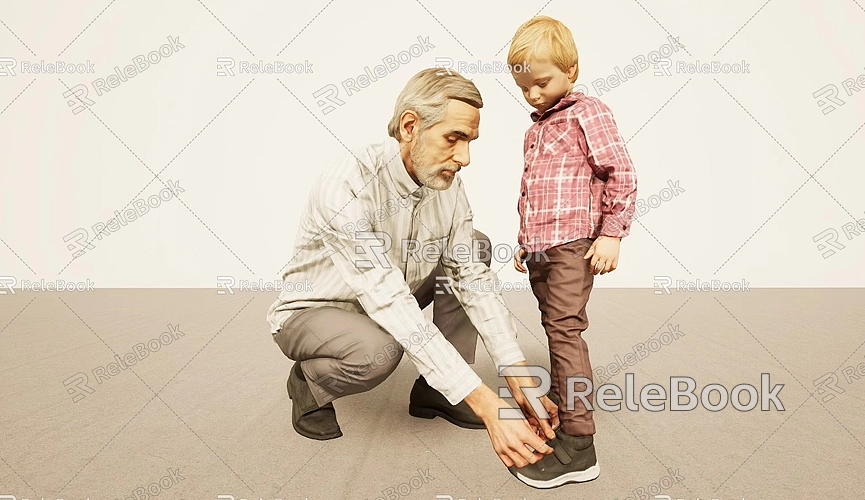
How to Model a Human in SketchUp
In the field of 3D modeling, human modeling is a complex and challenging task, especially when using tools like SketchUp. Many beginners may find this task daunting. Although SketchUp is excellent for modeling in fields like architecture, interior design, and urban planning, the level of detail and complexity required for human models can often be overwhelming. However, by mastering a few basic modeling techniques, you can still create impressive and realistic 3D human models in SketchUp.
Creating a human model is not just about technical skills, but also about understanding human anatomy, proportions, posture, and details. Whether you're designing a character for animation, games, virtual reality, or other types of projects, learning how to create a high-quality 3D human model in SketchUp will help you stand out in the design world. This article will guide you step by step through the process of modeling a human figure in SketchUp, starting with the basic concepts.

Understanding Human Anatomy and Proportions
Before starting any modeling work, the most important step is understanding the structure and proportions of the human body. Human proportions are one of the key factors in modeling, as they affect the overall natural and realistic appearance of the model. Typically, an adult's height is about 8 times the length of the head, and the head is the foundational unit of the entire model. By understanding these proportions, you can more easily adjust the size of each body part to match natural anatomical structure.
The proportions of the arms and legs are also crucial to consider. For example, the length of the arms and legs typically corresponds to the height of the torso, and the angles between the shoulders, elbows, and knees are critical for accurate modeling. The curves of the spine, the skeleton structure, and the way each joint connects are especially important for achieving a natural, dynamic look in the human model.
Once you have a solid understanding of human proportions and structure, you can begin the modeling process. The tools available in SketchUp will help you gradually build each part of the body, starting with basic geometric shapes and transitioning to more refined sculpting.
Choosing the Right Modeling Method
For human modeling, SketchUp's basic modeling tools are great for establishing the framework of the model. In general, you can start with simple geometric shapes, such as spheres or cylinders, to create the basic structure of the body. The head can start as a sphere, the torso as a rectangle or cylinder, and the limbs can be represented by rectangular prisms or cylinders. Once each part is completed, you can use the Push/Pull tool and other operations to adjust proportions and shapes.

For example, when creating the head, begin with a circle to define the basic outline, and then gradually adjust its height and width to match the proportions of the human body. Using the Push/Pull Tool will help you refine the shape, carving out contours such as the cheekbones, jawline, and brow ridge. Additionally, the Sculpting Tools can be used to create finer details like the eyes, ears, and nose.
Refining Details and Features
Once the basic shape of the model is complete, the next step is to focus on detailing and adjustments. These details are crucial for enhancing the final result. The facial expression, muscle lines, skin texture, and the feeling of the body’s different parts all require meticulous sculpting. SketchUp's Push/Pull Tool and Offset Tool are perfect for fine-tuning, allowing you to refine each body part.
The face is one of the most challenging parts. You can begin by drawing simple outlines for the eyes, nose, and mouth, and then use the Push/Pull Tool to carve out the finer details. The convexity of the face is particularly important, so pay special attention to the eyebrows, eye sockets, and nose bridge. The hands and feet are also essential, as the fingers and toes need to display natural curves and muscle lines.
For a more dynamic human model, posing and movement also play a vital role. If you need to position your model in a specific pose or show dynamic changes, you can use SketchUp’s Dynamic Components to make adjustments. By rotating and stretching the limbs, you can give the model different movements, such as running, standing, or sitting.
Applying Materials and Textures
After completing the basic modeling and detailing, the next step is to apply textures and materials to the model. Texture application is key to making the model look more realistic and lifelike, particularly when it comes to different materials like skin, clothing, eyes, and hair.
SketchUp provides a basic texture library, but if you’re looking for more professional results, you can utilize external resources. You can download high-quality 3D textures and materials from platforms like Relebook, which offers a wide variety of premium resources. If you need high-quality 3D textures and HDRIs for your models or virtual scenes, you can download them for free at Relebook Textures. For beautiful 3D models, visit Relebook 3D Models, where you'll find a large selection of top-tier resources. These platforms allow you to easily find the right textures for your human model, ensuring realistic materials like skin, hair, eyes, and clothing.
Rendering and Output
Once textures and materials are applied, the final stage is rendering and output. Rendering is an essential part of enhancing the final look of the human model. In SketchUp, you can use popular rendering plugins like V-Ray and Enscape to add lighting and shadow effects to your model. These plugins not only help optimize lighting but also enhance muscle lines, skin texture, and other detailed aspects. To achieve the best rendering results, you'll need to adjust the direction, intensity, and color of the light sources, as well as the depth of shadows, ensuring that the body parts of the human model display natural light and shadow effects.
After rendering, you can export your model as an image or animation for further display or modifications. Appropriate post-processing can make the model look even more lifelike, resulting in an impressive 3D human model.
Human modeling is a challenging process that requires mastering several stages, from basic modeling to detailed sculpting, texture application, and rendering. By understanding human proportions and structure, choosing the right modeling tools and techniques, and carefully refining details, you can create a realistic and dynamic 3D human model in SketchUp.
Although human modeling is challenging for beginners, through continuous practice and learning, you’ll be able to gradually improve your skills and create impressive character models. Remember, modeling is not just about accumulating technical knowledge, but also about artistic expression. Each sculpting and adjustment is a pursuit of detail, and every successful 3D model reflects the creator's dedication.
If you need high-quality 3D textures and HDRIs for your models or virtual scenes, you can download them for free from Relebook Textures. If you're looking for fine 3D models, visit Relebook 3D Models to find premium resources. By using these high-quality resources, you can enhance your modeling work and elevate the quality and impact of your projects.
In summary, learning human modeling is a long-term process that requires patience and practice. But with consistent effort, you’ll eventually become a skilled 3D modeler.

