How to Resize 3D Models in SketchUp?
Understanding the Importance of Resizing in SketchUp
Before diving into the "how-to," it’s important to understand why resizing is such a crucial aspect of 3D modeling in SketchUp. In many cases, you might start with a model that doesn’t quite fit your needs. Whether it’s a model downloaded from the internet or one you’ve created from scratch, dimensions often need adjustment. Resizing ensures that your model is proportionate to the other elements in your design, fits within specific constraints, or meets the client’s requirements. Accurate scaling can also improve the functionality and aesthetic of your project, leading to a more polished final product.
Preparing Your Model for Resizing
Before you begin the resizing process, it’s essential to prepare your model to ensure a smooth transition. Start by making sure that your model is grouped appropriately. In SketchUp, grouping objects prevents them from inadvertently sticking to other geometry during scaling. To group an object, select the entire model or components you wish to resize, right-click, and choose "Make Group." This will encapsulate your selection, making it easier to manipulate.
Next, it’s important to set your units correctly. SketchUp allows you to work in a variety of units, including inches, feet, meters, and millimeters. Ensuring that your model is in the correct unit of measurement before resizing will help avoid discrepancies later on. You can adjust your units by going to “Window” > “Model Info” > “Units” and selecting the appropriate option.
Resizing Using the Scale Tool
The most straightforward method to resize a 3D model in SketchUp is by using the Scale Tool. This tool allows you to adjust the size of your model along its axes, either uniformly or non-uniformly.
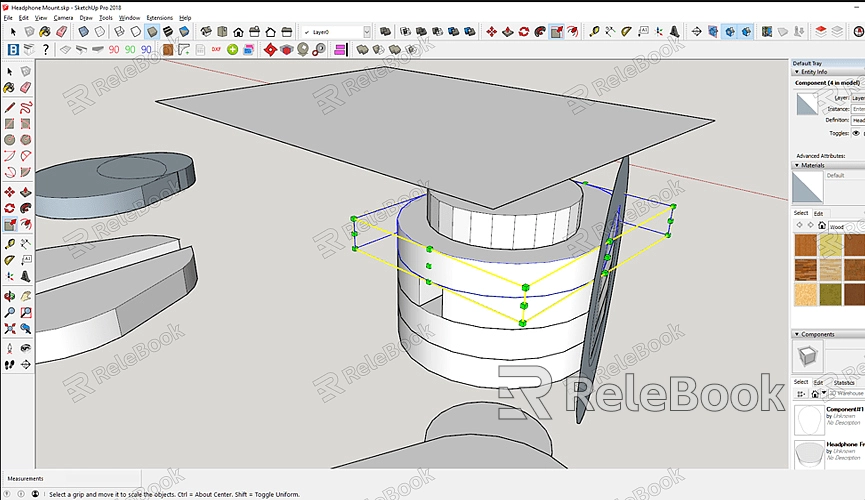
1. Select the Model
Begin by selecting the model or group you wish to resize. Click on the object to highlight it.
2. Activate the Scale Tool
With your object selected, activate the Scale Tool by clicking on the Scale icon in the toolbar or pressing the “S” key on your keyboard. This will surround your model with a box of green handles, which represent different scaling points.
3. Resizing the Model
To resize the model uniformly (scaling the model equally in all directions), click and drag any of the corner handles. For non-uniform scaling (stretching or squishing the model in specific directions), drag any of the side handles. As you drag, you can enter a specific scale factor by typing a number followed by the Enter key (for example, typing “2” will double the size of the model). If you need to resize the model to a specific dimension, simply type the desired measurement and press Enter.
Resizing Using the Tape Measure Tool
Another method for resizing in SketchUp involves the Tape Measure Tool. This tool is particularly useful when you need to scale the entire model to a specific dimension.
1. Select the Tape Measure Tool
Activate the Tape Measure Tool by clicking on its icon in the toolbar or pressing the “T” key on your keyboard.
2. Measure a Reference Line
Choose a reference line on your model that you wish to resize. Click on one end of the line, then move your mouse to the other end and click again. This will display the current length of the line.
3. Enter the Desired Length
After measuring, type the desired length you want for the reference line and press Enter. SketchUp will prompt you with a dialog box asking if you want to resize the entire model. Click "Yes," and SketchUp will scale your model proportionally so that the reference line matches the new dimension.
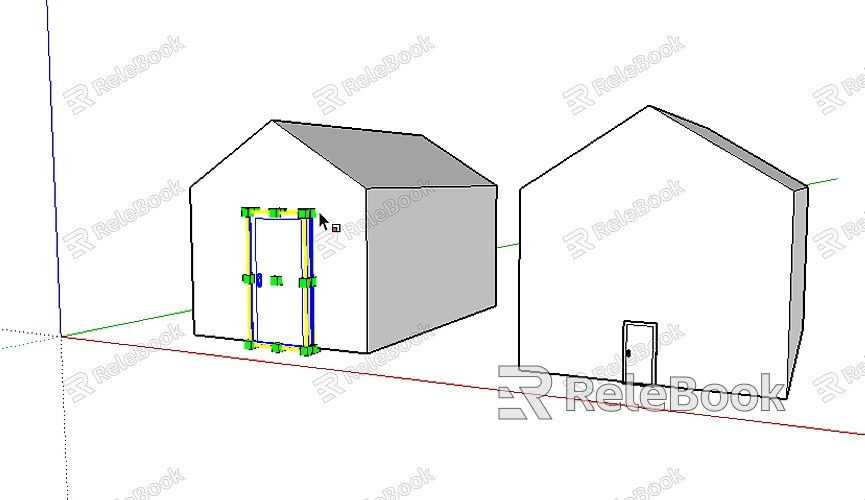
Resizing Specific Components
Sometimes, you may only need to resize specific components of your model rather than the entire thing. For this, you can use either the Scale Tool or the Move Tool, depending on the complexity of the adjustment.
1. Using the Scale Tool:
Follow the same steps as mentioned earlier but select only the component you wish to resize. This method is ideal for scaling elements like windows, doors, or other individual parts of a model.
2. Using the Move Tool:
For more detailed resizing, you might need to use the Move Tool. Select the Move Tool from the toolbar (or press “M” on your keyboard). Click on the part of the model you wish to adjust, and move it along an axis to resize it. For example, if you want to extend a wall, you can click on one end of the wall and drag it to the desired length.
Checking and Refining Your Model
After resizing, it’s crucial to check your model to ensure everything is scaled correctly. Look for any distortions or misalignments that might have occurred during the resizing process. Use the Orbit Tool to view your model from different angles and make sure it fits within your design parameters.
If any issues are detected, you can make further adjustments using the Move or Scale Tools. Remember, SketchUp’s undo feature (Ctrl+Z) is your friend if you need to backtrack.
Common Resizing Pitfalls and How to Avoid Them
Resizing 3D models in SketchUp is generally straightforward, but there are some common pitfalls to be aware of:
1. Distorted Geometry
Non-uniform scaling can sometimes result in distorted geometry. To avoid this, use the Scale Tool with care, and consider working with smaller components rather than scaling an entire model at once.
2. Incorrect Unit Measurements
Always double-check that you’re working in the correct units before resizing. An error in units can result in a model that is either too large or too small.
3. Unintended Stretching
If your model has grouped elements, ensure that you’re not unintentionally stretching certain parts by using the wrong scaling handle. Work with grouped components to control scaling more precisely.
FAQ
Can I resize a model without distorting it?
Yes, you can resize a model uniformly by using the corner handles of the Scale Tool, which will maintain the proportions of the model.
How do I resize an entire SketchUp model to fit specific dimensions?
You can use the Tape Measure Tool to resize the entire model. Measure a reference line, enter the desired length, and confirm when SketchUp prompts you to resize the whole model.
Is it possible to scale just a portion of a model?
Yes, you can select and group-specific components of your model and then use the Scale Tool to resize just that portion without affecting the rest of the model.
Will resizing affect the model’s textures?
Resizing may affect textures, particularly if you use non-uniform scaling. Always check your textures after resizing and adjust them as necessary using the Paint Bucket Tool or the Texture Positioning feature.
Can I undo a resize if I make a mistake?
Absolutely. You can undo your last action by pressing Ctrl+Z. SketchUp allows multiple undo levels, so you can backtrack as needed.
