How to render blender fluid simulatin
Blender is a powerful 3D creation tool with extensive simulation capabilities, among which fluid simulation is a robust feature often used to create realistic water flows, liquids, and other fluid effects. Rendering realistic fluid effects can significantly enhance the realism of animations or static scenes. If you're not yet familiar with rendering fluid simulations in Blender, this guide will walk you through the process and provide some tips to help you get started.
Basic Fluid Simulation Setup
To start with fluid simulation in Blender, you need to create a scene that includes fluid objects. Typically, this involves a "fluid source," a "domain," and "obstacles." The domain defines the boundaries of the simulation, setting the limits within which the fluid can move; the fluid source is the core of the simulation, determining the fluid's starting point and properties.
In Blender, you can set the type of fluid through the "Physics Properties" tab. Fluid types can include liquids, water, oil, and more, depending on your needs. Make sure the dimensions of the fluid source and domain are appropriate, and that the fluid source's resolution is high enough to ensure a detailed simulation.
Optimizing Simulation Parameters
In fluid simulations, resolution and subdivision are crucial factors affecting the final render quality. You can increase the "Resolution Divisions" value to add more detail to the fluid. Higher resolution results in finer fluid representation but also increases computational complexity and time. Therefore, you might use lower resolution during testing and increase it for final rendering once you’re satisfied with the simulation.
Additionally, pay attention to cache settings for fluid simulations. By enabling caching, you can save the data from the simulation process, avoiding recalculations each time. This allows you to adjust simulation parameters without starting over, saving substantial time.
Adding Materials to the Fluid
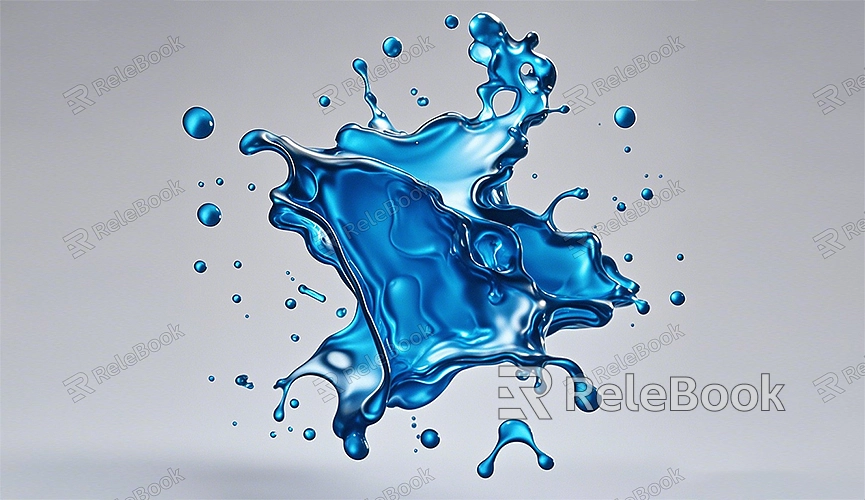
After completing the basic fluid simulation, you can add materials to enhance its visual effect. Water-like fluids typically use transparent or semi-transparent materials with reflection and refraction effects. In Blender, you can use the Shader Editor to apply glass or transparent materials to the fluid and adjust the IOR (Index of Refraction) to simulate different fluid characteristics.
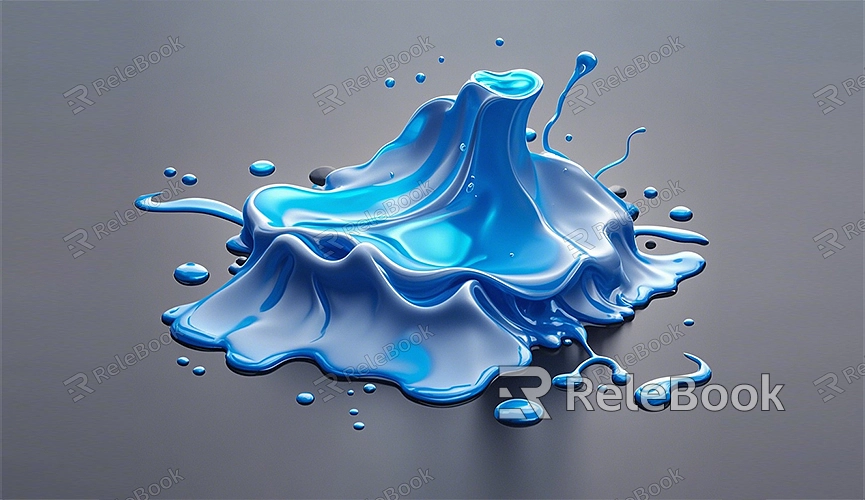
To make the fluid look more realistic, you can also add high-quality textures and maps, such as ripples and foam. If you need high-quality 3D textures and HDRIs for creating models and virtual scenes, you can download them for free from [Relebook](https://textures.relebook.com/). High-quality textures will greatly enhance your fluid simulation.
Lighting Setup and Scene Optimization
Lighting is crucial for rendering fluid simulations effectively. Proper lighting setup can highlight the fluid’s transparency, reflection, and refraction effects. In Blender, you can use a combination of environment light and point lights to simulate sunlight on the water surface or indoor lighting effects.
HDRI maps are also a valuable tool for natural lighting effects, adding depth to the environment. Adding an HDRI map in the world settings will make light reflect more realistically on the fluid surface. With the right lighting setup, your fluid simulation will become more vivid and visually striking.
Rendering Settings
Before starting the render, ensure you have selected the appropriate rendering engine for your scene. Blender offers several rendering engines, including Eevee and Cycles. Eevee is a real-time renderer suitable for previews and quick renders, while Cycles provides more realistic ray-tracing effects, ideal for high-quality final output.
In Cycles rendering, ensure that the sampling rate is high enough to avoid noise during rendering. Enabling the "Denoise" feature can reduce unwanted image noise and improve overall image clarity. For fluid simulation scenes, it’s usually recommended to use a sampling rate above 1000 to ensure smooth and detailed rendering of water surfaces and transparent materials.
Post-Processing
After rendering, you can use Blender's compositor or other post-processing software to further refine the results. In the compositor, you can add effects such as blur, glow, or depth of field to enhance realism and dramatic effect. For artistic fluid simulation scenes, adjusting color curves and contrast can amplify the visual impact.
Post-processing, while not always necessary, can perfect your render, especially in high-end animation and visual effects projects.
By following this guide, you now have the foundational knowledge for rendering fluid simulations in Blender. From setting simulation parameters to adding materials, optimizing lighting and rendering settings, and performing post-processing, each step is crucial for achieving high-quality render results. With practice and experimentation, you can create more realistic and detailed fluid effects for various creative projects.
If you need high-quality 3D textures and HDRIs for your models and virtual scenes, you can download them for free from [Relebook](https://textures.relebook.com/). For exquisite 3D models, visit [Relebook](https://3dmodels.relebook.com/), which offers a wealth of premium 3D resources. These resources will help you enhance your work quickly and add endless possibilities to your creations.
