How to Make a 3D Vtuber Model
With the rising popularity of Vtubers (virtual YouTubers), more people are interested in creating their own 3D Vtuber models. These models can be used for live streaming, video production, and creating a unique virtual persona for personal or commercial brands. This guide will provide detailed instructions on how to create a 3D Vtuber model using Blender, helping you build your virtual character from scratch.
Concept Design and Model Creation
Before starting 3D modeling, it’s essential to clarify the design concept for your Vtuber character. This includes the character’s appearance, clothing, hairstyle, and personality traits. Begin by sketching your ideas on paper or using digital drawing tools to determine the overall style of the character.
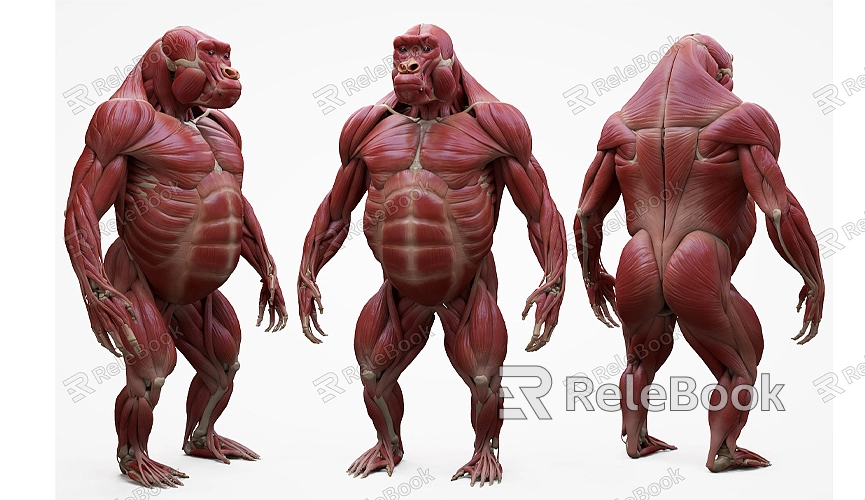
Creating the Base Model
Once the design concept is finalized, you can start creating the base model in Blender. It’s often helpful to begin with the head, as Vtuber characters are typically showcased through facial expressions and movements.
- Use the Mirror Modifier: Employing the Mirror Modifier ensures symmetry on both sides of the character, saving modeling time.
- Refine Facial Features: Use sculpting tools and edit mode to fine-tune the facial features of the character, including the eyes, nose, and mouth.
- Create Hairstyle and Clothing: Hairstyle and clothing are key elements of the Vtuber model. Use Blender’s curve tools to model the hairstyle and fabric simulation to design clothing.
If you need high-quality 3D textures and HDRIs for modeling and virtual scenes, you can download them for free from [Relebook](https://textures.relebook.com/). These resources can help achieve more realistic effects.
Applying Materials and Textures
After creating the model, the next step is to apply materials and textures. This step is crucial for the visual impact of the character, especially in detailing.
Using Material Nodes to Set Materials
Blender’s material node system provides powerful tools for assigning different material effects to the model. For example, skin can be set up using the “Principled BSDF” node, while clothing materials can be created by combining color, roughness, and normal maps for various textures.
- Skin Material: Skin materials should exhibit smoothness and subtle color variations. Adjust the node’s roughness and scattering parameters to simulate natural skin effects.
- Clothing Material: Choose different node combinations based on the design needs, such as cotton, silk, or leather effects. You can download high-quality textures from [Relebook](https://textures.relebook.com/) and apply them to enhance the overall texture.
Rigging and Animation
With the base model and materials in place, the next step is to rig the character and create animations. This step is key to enabling various expressions and movements for your Vtuber character.
Rigging
In Blender, adding a skeleton (rigging) allows you to control different parts of the character. Start with a simple skeleton and gradually add complexity to control facial expressions, limb movements, and poses.
- Automatic Weight Painting: Blender’s automatic weight painting feature helps bind the skeleton to the model, but you may need to manually adjust weights in key areas to ensure natural movement.
- Add Controllers: To make controlling the character easier, add controllers to the skeleton. Controllers allow you to adjust the character’s pose and expressions conveniently, ideal for live streaming and video production.
Creating Animations
Animation is crucial for bringing the Vtuber character to life. Use Blender’s animation tools to create various expressions and movements, such as smiling, blinking, and waving.
- Facial Animations: Facial animations are typically done using keyframes. Set up different facial expressions and save them as presets for quick switching during live streams or videos.
- Movement Animations: In addition to facial expressions, create simple movement animations like walking or dancing. These animations can be controlled via the skeleton system and enhanced with physics simulations for a more realistic effect.
Rendering and Output
After setting up the model, materials, and animations, the final step is to render and output your 3D Vtuber model. Blender offers several rendering options, so choose the appropriate render engine and output format based on your needs.
Choosing a Render Engine
Blender has two main rendering engines: Eevee and Cycles. Eevee is suitable for real-time rendering with fast results, while Cycles is better for high-quality final renders, offering more realistic lighting and shadow effects.
Rendering Settings
- Adjust Sampling: To avoid noise and improve image quality, increase the sampling rate, especially when using Cycles. Typically, 300 to 500 samples provide a good balance.
- Set Resolution: High resolution is crucial for detail in Vtuber renders, so choose 1080p or higher resolution based on your needs.
Output and Post-Processing
After rendering, export the image or video and perform post-processing in other software. Post-processing can further optimize color, contrast, and effects, making your Vtuber model more engaging.
By following these steps, you can create a complete 3D Vtuber model in Blender. Each phase—from concept design and model creation to material application, rigging, and final rendering—requires attention to detail to ensure a high-quality character. If you need high-quality 3D textures and HDRIs, download them for free from [Relebook](https://textures.relebook.com/). For beautiful 3D models, visit [Relebook](https://3dmodels.relebook.com/). Relebook offers a wealth of premium 3D resources to help you complete your project with ease.
