How to Model a Grate in SketchUp
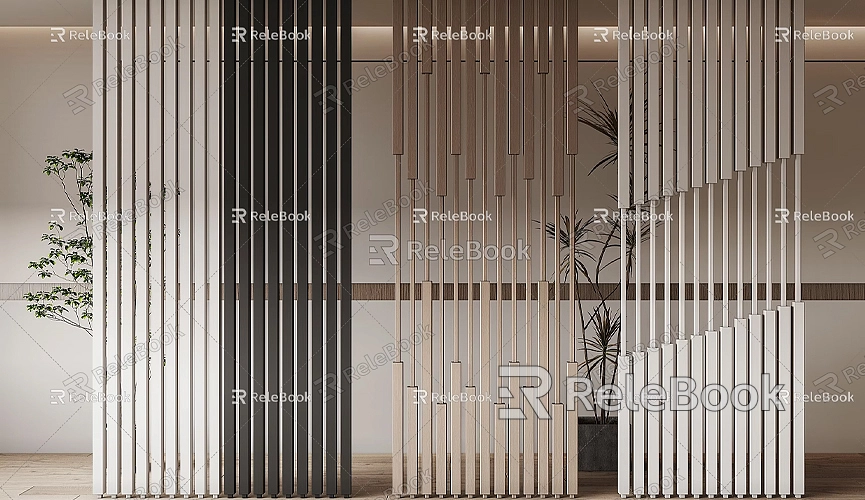
Modeling a grate in SketchUp is an interesting and challenging process that involves not only creating basic shapes but also fine-tuning textures and selecting appropriate materials. Grates are widely used in architecture, interior design, and many other fields, such as drainage systems, ventilation systems, or decorative designs. This article will guide you through detailed steps to help you create a beautiful grate model in SketchUp, along with some tips to enhance the realism of your model.
Building the Basic Grate Structure
The core of a grate model is typically a rectangular or square frame, so in SketchUp, the first step is usually to use the Rectangle Tool to draw a basic rectangle. This will form the base structure of the grate, essentially its outer frame. For ground grates, you will need to decide on the size of the grate and the space it will occupy. Depending on the design, the length and width of the rectangle can vary. Generally, the size of the grate should be in proportion to its surrounding environment to ensure visual consistency.

Once the basic shape is drawn, you can use the Push/Pull Tool to give the grate a certain thickness. This step adds volume and makes the model more realistic. In practice, grates are usually quite thin, but you can adjust the thickness as per your design requirements.
Cutting Holes and Creating the Grid
The defining feature of a grate is the gaps or holes inside it, which allow for ventilation, drainage, and other functions. Therefore, creating these holes is a key part of the modeling process. You can choose various hole shapes, such as square, rectangular, or circular. First, use the Line Tool to draw the grid pattern on the surface of the rectangle, defining the size and spacing of the holes. When determining the hole sizes and spacing, make sure they align with both functional needs and aesthetic standards. If the holes are too close together, the grate's permeability may be reduced, affecting its functionality. On the other hand, if the holes are too large, it may affect the structural integrity and visual appeal of the grate.
Once the grid layout is finalized, you can use the Push/Pull Tool to cut out these areas. To do this, select the interior regions of the grid and use the Push/Pull Tool to extrude them out. This will transform the original solid rectangular frame into a grate structure with numerous holes.
Designing the Horizontal and Vertical Beams
A grate’s structure consists of interwoven horizontal and vertical beams, providing necessary strength while maintaining transparency and airflow. In SketchUp, you can continue to use the Rectangle Tool to draw these beams. Start by drawing the basic shape of the horizontal beams, determining their length and width to ensure they meet your design requirements.
Next, use the Push/Pull Tool to give the horizontal beams thickness, turning them into real structural elements. The vertical beams can be created in a similar manner, though they are typically shorter than the horizontal beams. Using the Move Tool, you can precisely position the horizontal and vertical beams so that they cross each other in a regular, organized pattern. Make sure the beams align within the rectangular grid to ensure both the visual appeal and stability of the grate.
Refining Proportions and Details
Once the basic structure is complete, you can begin fine-tuning the proportions and details. The Scale Tool is very effective in this phase, as it allows you to adjust the overall size of the grate to ensure it fits the proportions of the surrounding environment. By adjusting the proportions, you can make sure that the grate looks balanced and does not appear too cramped or too loose.
Additionally, you can use the Line Tool to add more intricate details to the design, such as small decorative features at each intersection or reinforcing the structural strength of the beams. For more high-end grate designs, artistic elements can be added to the crossing beams to enhance their decorative quality. This not only makes the grate more visually appealing but also adds uniqueness to its real-world application.
Applying Textures and Materials
The visual impact of a grate largely depends on the textures and materials you choose. SketchUp provides a wide variety of textures that can be applied to the surface of the grate, making it look more realistic. For example, if you’re modeling a metal grate, you can select a metallic texture and adjust its reflectivity and glossiness to make the grate appear to have a natural reflective effect under light. If you’re creating a wooden grate, you can choose an appropriate wood texture and adjust its scaling so that the grain matches the size of the grate.
Beyond selecting textures, you can also use the Material Editor to fine-tune the details of the textures, such as increasing their reflectivity or adjusting the color saturation, to make the grate appear more realistic. For grates placed in indoor scenes, you can adjust lighting and shadows to make them look more three-dimensional and detailed under varying lighting conditions.
Using Plugins to Improve Efficiency
For more complex grate designs or when you need to create multiple similar grates, using SketchUp plugins can significantly improve your modeling efficiency. For example, the Grid Maker plugin is a very useful tool designed specifically to help users create regular grids and grates. Simply set the desired hole size, spacing, and other parameters, and the plugin will automatically generate the required grid structure, saving you time on manual drawing and adjustments.
By using these plugins, you can quickly generate various grate styles and make flexible adjustments to suit different design needs. These tools not only save time but also ensure consistency and precision in every grate model you create.
Adding Decorative Details and Final Optimization
At the final stage of the grate modeling process, don’t overlook the decorative details and overall optimization. For ground grates, you can add decorative elements around the edges, such as small bricks or stones, to enhance their artistic feel. You can also use the Round Corner Tool and the Arc Tool to add smooth curves to the corners or joints of the grate, reducing the stiffness created by sharp lines and making the grate’s appearance more gentle.
If the grate is intended for a specific environment, it’s a good idea to adjust the model’s appearance based on the lighting conditions of that environment. By utilizing SketchUp’s lighting and shadow effects, you can make your grate appear more dynamic and enhance its realism in various settings.
Final Checks and Output
Once you’ve completed the grate model, don’t forget to perform a final check. This includes verifying that the textures have been correctly applied, the holes are properly aligned, and the dimensions meet your design requirements. After ensuring every detail is perfect, you can export the model in various formats for use, or render the final image directly in SketchUp.
For grates intended for 3D printing, you can export them in STL format, ensuring the model meets the printer’s specifications. You can also export the model in CAD format if further processing in other software is required.

Modeling a grate is a process that blends creativity, precision, and attention to detail. From creating the basic shapes to refining details, applying textures, and selecting materials, each step requires careful consideration. By efficiently using SketchUp’s tools and plugins, you can quickly produce stable, visually appealing grates and adjust the model to meet both functional and aesthetic requirements. Whether it’s a ground grate, ventilation grate, or decorative grate, SketchUp can help you bring your design ideas to life.
If you need high-quality 3D textures and HDRI for your virtual scenes, you can download them for free from Relebook Texture Library. For fine 3D models, visit Relebook 3D Models to find a wide range of top-tier resources. These assets will further enhance the quality and realism of your grate model, making it even more lifelike and detailed.

