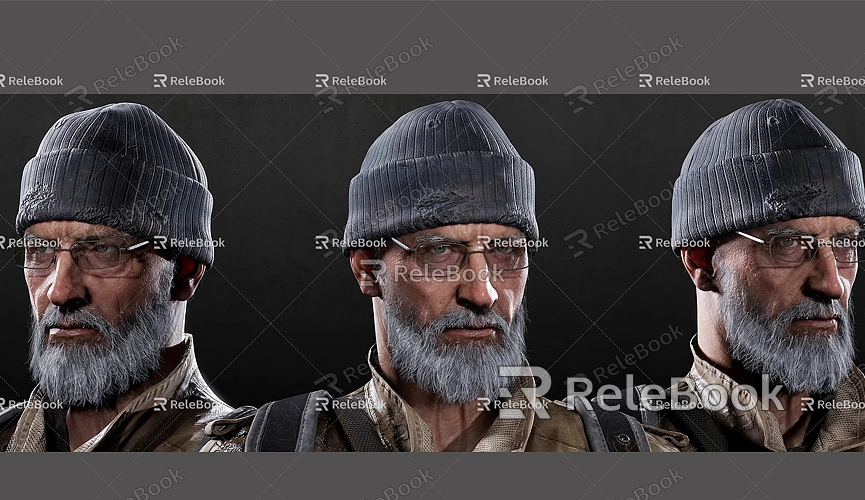
How to Model a Head in SketchUp
When learning how to model a human head in SketchUp, many people may find it to be a very complex and difficult task. After all, the human head has many intricate details, from the basic skull structure to the fine facial features, and modeling each part requires precision and patience. However, once you master the correct steps and techniques, you'll find that the process is not as daunting as it seems. Instead, it can be highly rewarding and will allow you to progress further in the world of 3D modeling.
This article will provide a detailed guide on how to model a head in SketchUp, covering everything from basic construction to fine detailing, and applying textures and materials. We will also discuss how to use plugins and external resources to enhance your modeling efficiency, making your 3D model more realistic and professional. Whether you're a beginner just starting with SketchUp or someone with some experience aiming to improve your skills, this article will provide many practical tips and insights.

Understanding the Head Structure
Before you start modeling, it's essential to have a thorough understanding of the human head's structure. The head consists not only of the skull but also several facial features, such as the eyes, nose, mouth, and ears. The proportions, positions, and shapes of these features are all important factors to consider in the modeling process. Often, the success of the model depends on how well you understand and handle these details.
Typically, the first step in 3D modeling is to break down these complex details into simpler shapes. For example, the basic shape of the head can be represented by a sphere, and from there, facial features can be progressively sculpted. By breaking down complex forms into simple geometries, you can more easily adjust proportions and placements, laying a strong foundation for later detailing.
In SketchUp, you can use the "Reference Image" tool to import side and front view images into your modeling workspace. These reference images will help you accurately determine the proportions and positions of different parts of the head. Once the images are positioned at the correct angles and scale, you're ready to start modeling.
Basic Head Modeling
The first step in head modeling is usually constructing a simplified spherical shape. The rough shape of the skull is essentially a sphere, so you can start by using SketchUp’s Circle Tool to draw a circle in the front view, then use the Push/Pull Tool to extrude it into a hemisphere or sphere. This sphere will serve as the base for the entire head model.
When constructing the base shape of the skull, make sure that the proportions are in line with those of a real human head. Although the model may seem simple at first, it forms the foundation for all subsequent detailing. Ensuring that the size and position of the sphere are correct will make your later work much easier.
Next, you can use the Move Tool and Scale Tool to adjust the shape of the sphere, bringing it closer to the natural contours of the head. The skull is usually slightly flattened, especially at the top and chin areas. You can simulate this characteristic by stretching and compressing the sphere accordingly.

Sculpting Facial Features
After you have the basic head shape, the next step is to sculpt the facial features. These include the eyes, nose, mouth, and ears—each of which must be modeled separately while coordinating with the overall head structure. When modeling these details, pay attention to the size, shape, and spacing between each feature.
Eyes
The eyes are one of the most expressive parts of the face, so special attention should be given to their details. Start by drawing a circle and use the Push/Pull Tool to extrude it into the basic shape of the eyeball. Then, position the eyeball in the correct spot on the head, usually slightly above the center of the head. Use the Move Tool to adjust the angle and depth of the eyeball, ensuring it aligns correctly with the eye socket.
To make the eyes appear more realistic, you can add finer details, such as the iris, pupil, and eyelids. These small touches will greatly enhance the overall realism of your model.
Nose
Modeling the nose is a bit more complex than the eyes, as it involves several curved surfaces and details. Start by creating a simple cylinder to represent the bridge of the nose. Use the Push/Pull Tool to stretch the nose bridge down and gradually sculpt the tip and nostrils. When shaping the nostrils, use the Arc Tool to create smoother curves, making the nose appear more natural and dimensional.
Pay particular attention to the nostrils. You can model them by drawing small circles and extruding them inward to create depth. With careful sculpting and adjustments, the nose will take on a more realistic shape.
Mouth
Modeling the mouth is relatively straightforward. You can start by using the Rectangle Tool to draw the outline of the lips and then use the Push/Pull Tool to give it depth. From here, use the Move Tool to adjust the shape of the lips to make them look more natural. Be especially mindful of the curvature at the corners of the mouth to ensure the proportions of the lips are harmonious with the rest of the face.
It’s also important to maintain the natural distance between the mouth and other facial features, such as the nose and eyes, to keep the proportions correct.
Ears
Modeling the ears is often one of the most challenging aspects of head modeling. Unlike other facial features, ears have a more complex, irregular shape that requires finer sculpting and adjustments. Start by drawing an oval shape, then use the Push/Pull Tool to extrude and shape it into the contours of the ear. Carefully adjust the inner and outer ear outlines and the ear canal shape to ensure accuracy and proportion.
Detail Sculpting and Texture Application
Once the basic head shape and facial features are complete, the next step is to focus on fine detail sculpting and texture application. Use more detailed sculpting tools to add small refinements that enhance the facial depth and realism. For example, you can add tiny details around the nose bridge and eye area to simulate the delicate skin texture.
To make the model look more realistic in SketchUp, you need to apply textures and materials. You can choose suitable skin textures from SketchUp’s built-in texture library or download high-quality texture images to enhance the model’s details. Using high-definition textures is especially important because the added detail will make the model appear more vibrant when rendered.
For high-quality 3D textures and HDRI for your models and virtual scenes, you can download them for free from Relebook Texture Library. If you need detailed 3D models, visit Relebook 3D Models for a variety of high-quality resources. These assets can further enhance your head model by adding finer details and improving the overall effect.
Using Plugins to Improve Modeling Efficiency
If you want to speed up the modeling process, using plugins is a great choice. SketchUp has several powerful plugins that can help you achieve finer details in your sculpting. For example, the Artisan plugin is great for detailed sculpting, particularly for facial features. The SubD plugin is useful for creating smoother curves, making various parts of the head model more natural and fluid.
By using these plugins effectively, you can save a lot of time during the modeling process and improve the accuracy of your model.
Rendering and Display
Once the modeling and texturing are complete, the final step is rendering. Rendering allows you to generate high-quality images or animations that bring your 3D head model to life. SketchUp supports various rendering plugins, such as V-Ray and Enscape, which simulate realistic lighting and material effects, making your model visually stunning.
Through the steps outlined above, although modeling a head requires detailed sculpting and adjustment, once you master the right techniques and methods, you can gradually create a high-quality 3D head model. Whether you're working with basic modeling skills or using textures and plugins, each tool will help you finish the task more efficiently and precisely. If you need high-quality 3D textures and HDRI, be sure to download them from Relebook Texture Library. For fine 3D models, visit Relebook 3D Models, where you’ll find an array of premium resources. With these resources and tools, you can add more realism and professionalism to your head model.

