How to Make a 3D House Model on a Computer
Creating a 3D house model is a classic task in 3D modeling. Whether you're doing it for games, animation, or visualization design, mastering this skill is highly valuable. This guide will take you through the steps to create a realistic 3D house model on a computer, helping you build a perfect 3D house from scratch.
Choosing the Right Tools
Before you start creating a 3D house model, you need to choose the appropriate modeling tool. Common 3D modeling software includes Blender, 3ds Max, Maya, and Cinema 4D. We'll use Blender as an example here, as it is a powerful, open-source 3D modeling tool suitable for various modeling needs.
Preparation
1. Planning the Design: Before you begin modeling, it's best to draw a sketch of the house. This should include the exterior appearance, room layout, window and door positions, etc. This step will give you a clear direction during modeling.
2. Collecting Reference Materials: Gather reference images and models of house designs. These will help you maintain consistent proportions and details throughout the modeling process.

Starting the Model
1. Creating Basic Shapes: Launch Blender or your chosen modeling software and create a new project. In Blender, you can create basic shapes like cubes from the "Add" menu. Use these basic shapes as the main body of the house.
2. Editing Shapes: Use "Edit Mode" to modify the details of the basic shapes. You can use the "Select," "Scale," "Move," and "Rotate" tools to adjust the shapes, creating the walls, roof, and floors of the house.
3. Adding Details: Once you have the basic shapes, start adding more details such as windows, doors, roof tiles, etc. Use Blender's "Subdivision" and "Extrude" features to add details and make the house model more realistic.
4. Applying Materials: Adding materials and textures to the house model will make it look more realistic. You can apply different materials to the walls, floors, roof, etc. Blender offers a variety of material and texture options, and you can also import custom textures.
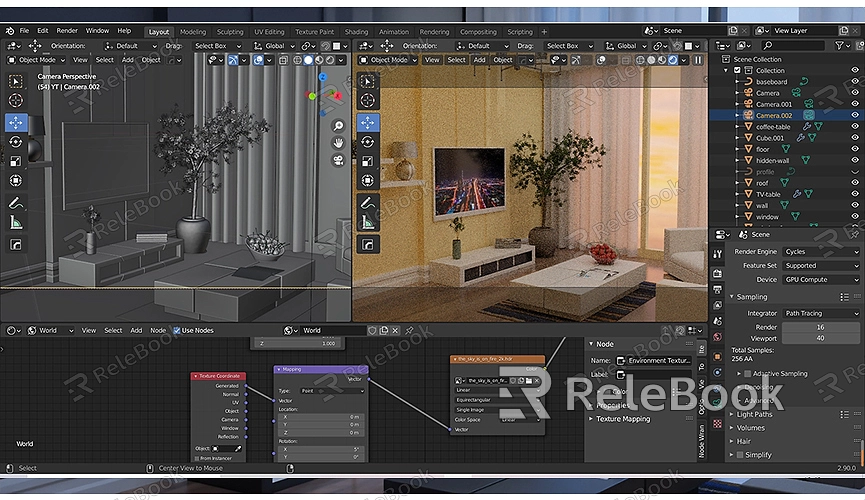
5. Setting Up Lights and Cameras: To render high-quality images, you need to set up appropriate lights and cameras. In Blender, you can add light sources and cameras from the "Add" menu and adjust their positions and angles for the best rendering effect.
Rendering and Optimization
1. Adjusting Render Settings: In the "Render Properties" panel, you can set the resolution, sampling rate, and other parameters. High resolution and high sampling rate will result in better image quality but will increase rendering time. Choose the appropriate settings based on your needs.
2. Rendering the Model: Click the "Render" button to start the rendering process. Once rendering is complete, you can view the results and make further adjustments and optimizations.
3. Optimizing the Model: If your model is very complex, it may slow down rendering or affect computer performance. In such cases, consider simplifying the model, reducing the number of polygons, or using more efficient rendering settings.
Post-Processing
After rendering, you might need to do some post-processing to enhance the visual effects. Blender's compositor tool can help you add effects, adjust colors, and more to make the final image perfect.
1. Using the Compositor: In Blender’s "Compositing" workspace, use the node editor for post-processing. Adjust colors, add blur effects, etc., to enhance the rendering results.
2. Saving and Sharing: After post-processing, remember to save the final image in your desired format. You can use it for showcasing, sharing, or further design work.
Creating a 3D house model is an engaging and challenging process. From basic modeling to detailed work, each step requires careful planning and execution. If you need high-quality 3D textures and HDRI for your models and virtual scenes, or if you need to download 3D models, you can find them on Relebook. After downloading, you can directly import the textures and 3D models into your project for use.

