How to model curbs sketchup
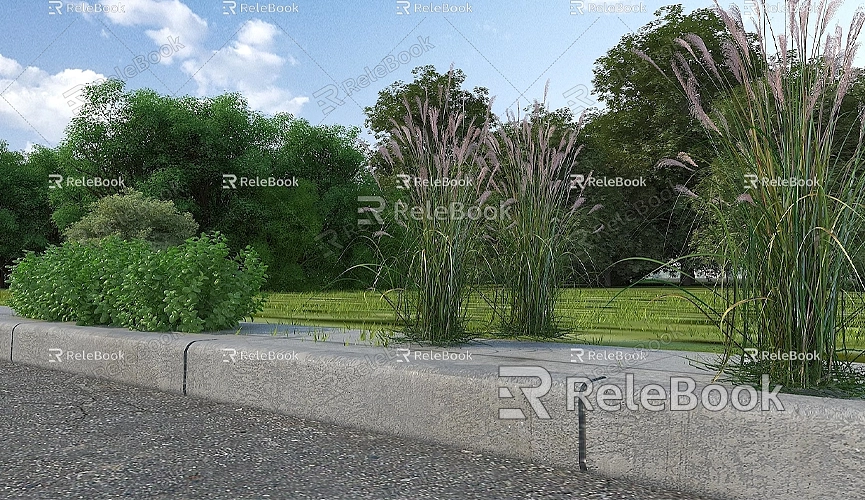
Curbs are an essential component of urban road construction. Not only do they help differentiate between roads and sidewalks, but they also enhance the aesthetic appeal of streets while improving safety. In 3D design, modeling curbs plays an important role in various scenes such as urban planning, road design, or virtual presentations. As an intuitive and efficient 3D modeling software, SketchUp is an excellent tool for creating curb models.
This article will provide a detailed guide on how to create precise and practical curb models in SketchUp, covering everything from preparation before modeling to techniques for optimization, as well as handling materials and textures. Whether you're working on architectural design or 3D visualization, these tips will surely help you in your projects.

Why Choose SketchUp for Modeling Curbs?
SketchUp is a powerful modeling tool, especially suitable for creating models like curbs that require repetitive and regular designs. Here are some of the key advantages of using SketchUp for curb modeling:
Simple to Use
SketchUp offers an intuitive user interface that even beginners can quickly grasp. For basic components like curbs, SketchUp allows you to quickly build models using simple geometric tools.
Flexible Plugin Support
SketchUp's plugin ecosystem is vast, with many plugins that can simplify complex modeling tasks. For example, the Bending Tool is great for handling curved curbs, while the Array Tool can easily generate large areas of repetitive curb structures.
Efficient Collaboration
SketchUp supports multiple file formats for import and export, making it easy to collaborate with other design tools like AutoCAD or Revit. It can also be used for subsequent rendering work, such as realistic scene simulations using V-Ray.
Preparation Before Modeling
Before diving into creating a curb, it’s essential to clarify some basic information and prepare accordingly. This preparation will ensure a smoother and more efficient modeling process.
Define the Purpose of the Model
The level of detail in your curb model depends directly on its intended use. If the model is for large-scale scene presentations, you can simplify the details to enhance performance. However, if the model is for close-up renders or 3D printing, higher precision and detail are required.
Gather Reference Materials
Before modeling, it’s recommended to gather some photos or blueprints of curbs for reference. While curbs may seem simple, their design can vary based on location and purpose, including straight, curved, or special designs with drainage slots.

Prepare High-Quality Texture Resources
For improving the realism of the model, the right textures and materials are crucial. If you need high-quality 3D textures and HDRI for your models and virtual scenes, you can download them for free from Relebook. Relebook also provides exquisite 3D models, offering a wealth of high-quality resources to help you model more efficiently.
Step-by-Step Guide to Modeling Curbs
Curbs may seem straightforward, but the modeling process can involve different shapes and detail handling. Let's start with basic shapes and gradually optimize the model while discussing some efficiency-boosting techniques.
Create the Basic Geometric Shape
The basic shape of the curb can be made with the Rectangle Tool. First, use the rectangle tool to draw the cross-sectional shape of the curb, such as a standard trapezoid or rectangular design. Then, use the Push/Pull Tool to extrude the cross-section into a 3D structure, generating the basic straight curb model.
During the extrusion process, adjust the length as needed. To make future edits easier, it’s recommended to group each segment of the curb separately for easier editing and movement.
Add Curves or Slanted Designs
Many curb designs include curves or slanted surfaces to allow vehicles to pass smoothly. You can use SketchUp's Arc Tool to draw arcs on the surface of the model, and then use the "Push/Pull" function to turn the arc into a 3D shape. Additionally, plugins like RoundCorner can easily create smooth transitions at the edges, making the model look more realistic.
If the curb follows a curved road, it needs to be arranged along the curve. For this, use the "Follow Me" tool to choose a predefined path and make the model follow that path, forming a natural curve along the road.
Optimize the Repetitiveness of the Model
Curb designs are often repetitive, especially in large-scale scenes. To avoid redundant operations, you can take advantage of SketchUp’s Copy and Array functions. After grouping the model, select the unit model and use the Move tool while holding down the "Ctrl" key to create a copy. Then, input the number and spacing to quickly arrange the curb segments.
Applying Materials and Textures
Curbs are typically made from concrete or stone, and their surfaces may show signs of wear and tear or cracks. These details can be simulated using textures. SketchUp offers flexible material application and adjustment. Here are a few tips for handling materials:
Import High-Quality Textures
You can download suitable concrete or stone textures from sites like Relebook and import them into SketchUp to apply them to the curb model's surface. If HDRI lighting effects are needed, you can use appropriate resources to enhance rendering quality.
Adjust Texture Scaling and Direction
In SketchUp, you can use the material editor to adjust the scale and orientation of textures, ensuring that the curb surface textures align with the model's dimensions. Adding fine details such as cracks and stains will further increase the realism.
Enhance Effects with Rendering Tools
If you want a more realistic rendering effect, you can import the model into rendering tools like V-Ray or Enscape. By adding highlights, shadows, and ambient light, you can simulate how sunlight would interact with the curb's material, making the final result much more lifelike.
Tips for Improving Modeling Efficiency
When modeling curbs in SketchUp, several tips and tools can help improve efficiency:
Using Plugins
Plugins like Curviloft, which handles complex curved surfaces, and Flowify, which arranges models along curved surfaces, can speed up the process of completing repetitive tasks, making the modeling process more efficient.
Component-Based Modeling
Save your curb model as a component, allowing it to be reused throughout the project. If any changes are required, you only need to modify the component's source file, and all instances will automatically update.
Save Multiple Versions
During modeling, it's a good idea to save files at different stages so that you can easily revert to earlier steps if necessary.
Modeling curbs in SketchUp can be broken down into several stages: creating basic shapes, optimizing details, and applying materials. Whether it’s a simple straight curb or a more complex curved design, mastering basic tools and techniques allows anyone to quickly create high-quality curb models.
Throughout the modeling process, choosing the right resources can significantly improve both work efficiency and model quality. If you need high-quality 3D textures and HDRI for your models and virtual scenes, be sure to visit Relebook for free downloads. You can also find exquisite 3D models on Relebook, which offers a wealth of high-quality resources for efficient modeling.
I hope this article has provided you with valuable insights for your modeling work. Whether it's for road planning or scene design, you can now use these methods to create realistic curb models. Let’s get creative with SketchUp and bring more exciting ideas to life!

